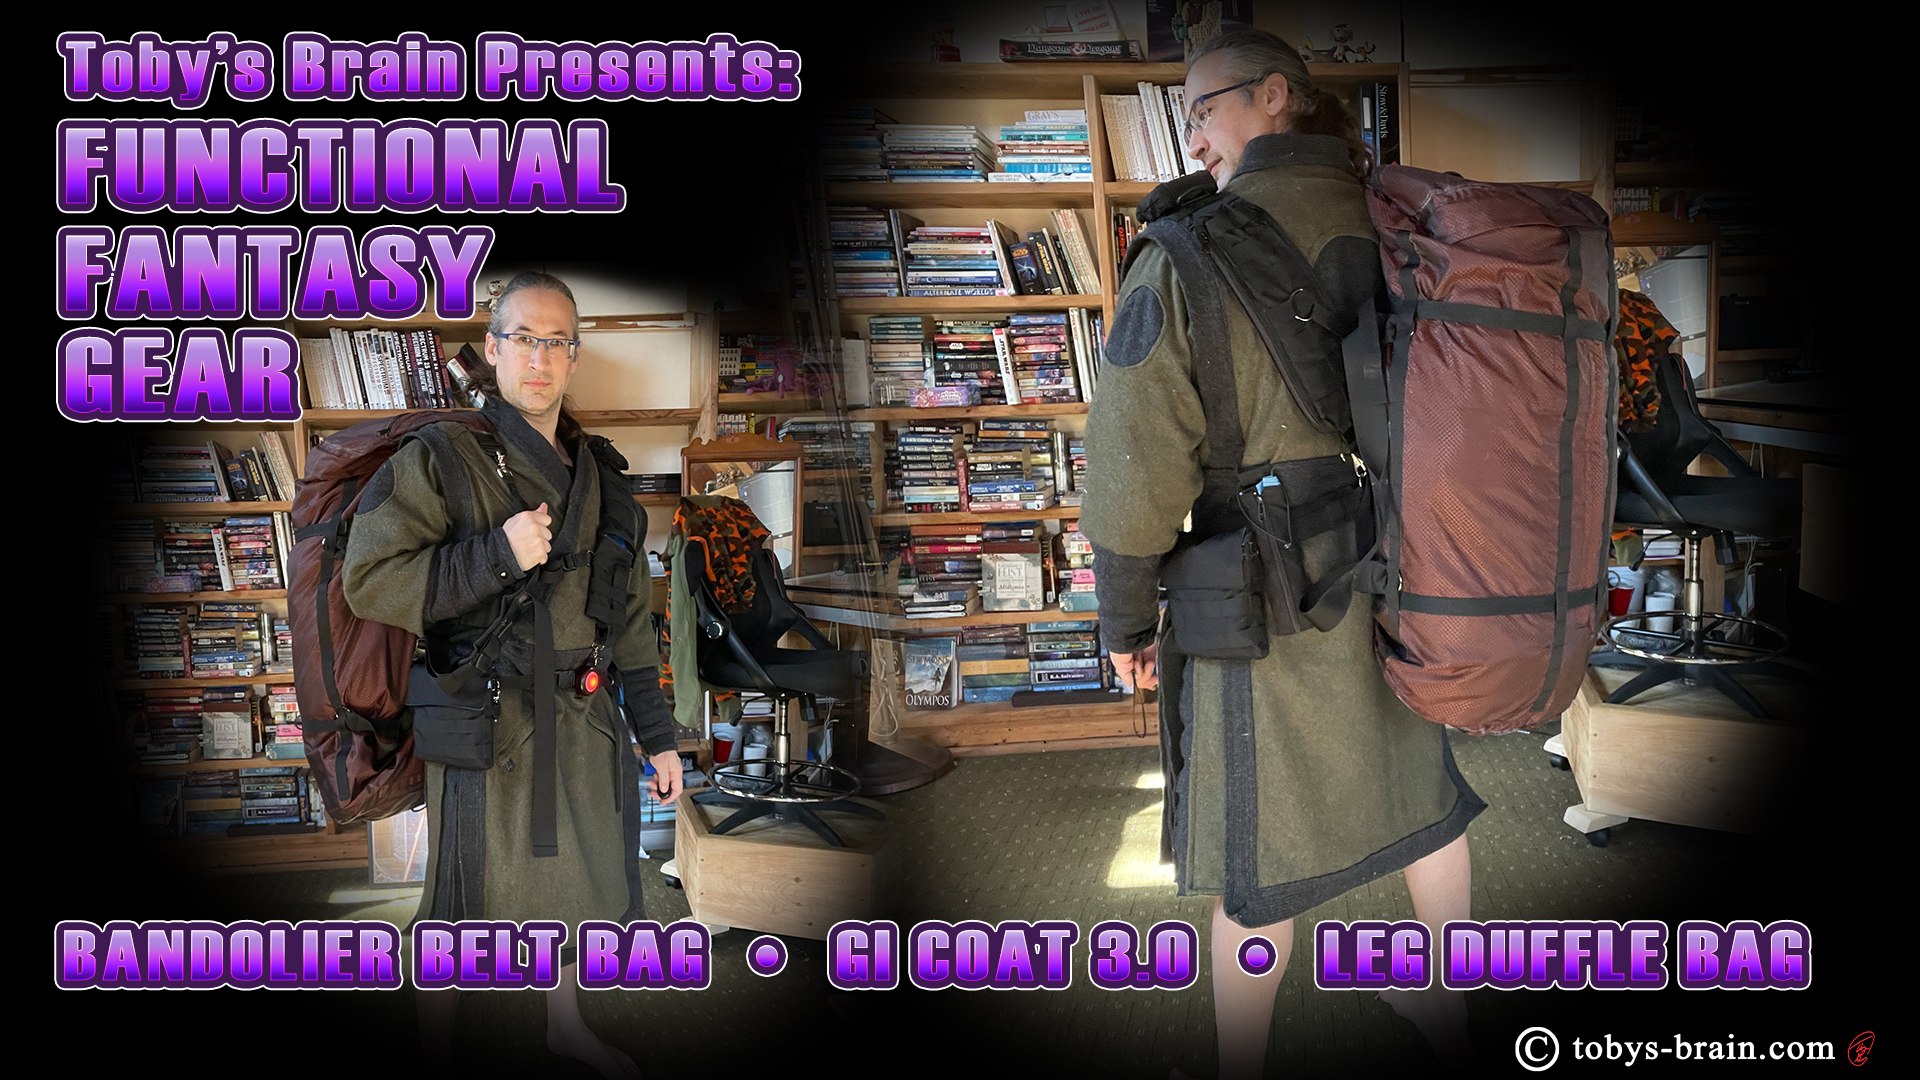
I. Am. Tired. BUT, at long last, my latest wool coat creation is complete (except for maybe some random adjustments that come up after wearing it around a while)!
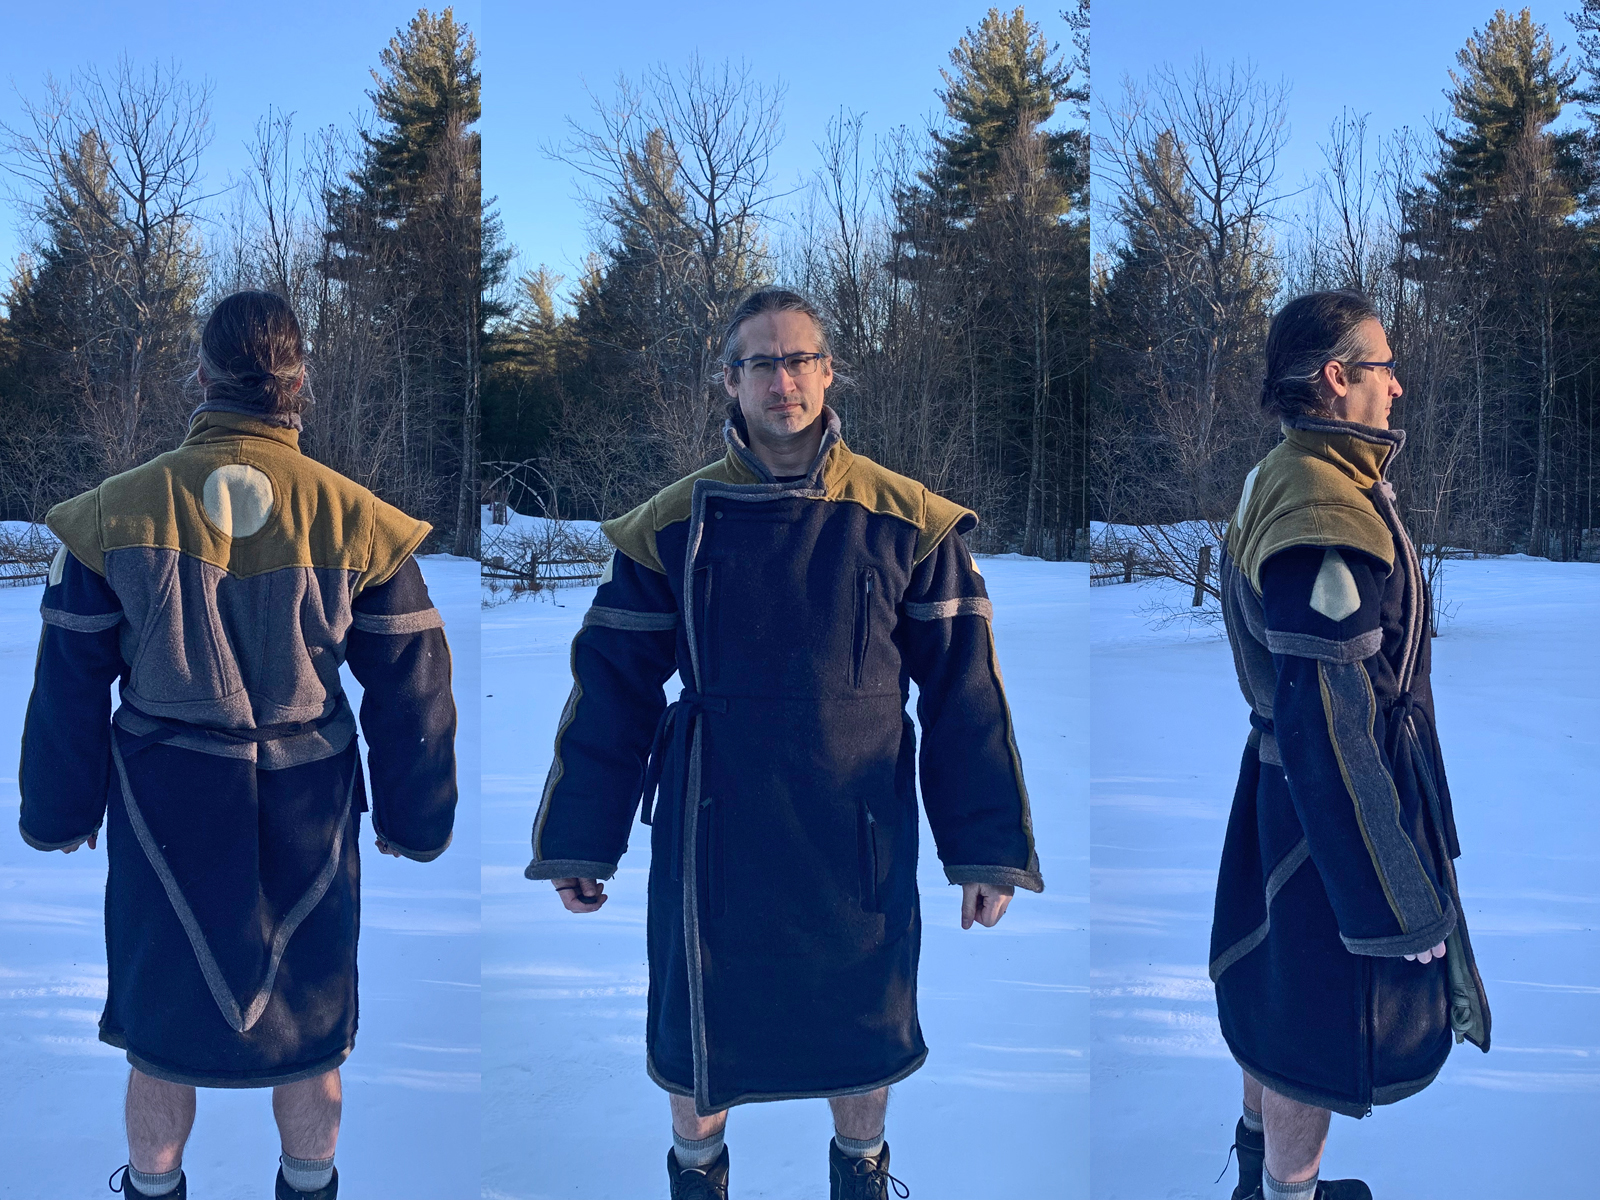
It’s built off of one of the first sewing projects I did several years ago: my “Gi Coat”. I’ve been a martial artist since 1995, and I have a great appreciation for martial arts related fashion (and Asian fashion in general). I’ve always liked the simplicity of my karate gi, overlap one side on the other and fasten with a couple of ties. That first wool gi coat I made was directly patterned after my karate gi, with a few extra features like longer sleeves and little hand warmer pockets inside the sleeves. It was roughly made, I didn’t know how to properly finish seems at the time, but it held up well and was really comfortable.
Some time ago, and after a few more coats and other sewing projects, I started thinking about going back to that gi coat and making it better, now that I was a little more experienced at sewing. I wanted something that would be super warm, but easy to vent excess heat when I’m active, something I could wear hiking, camping, and snowboarding, as well as just out and about in the winter.
I came up with a design that has a lot of influences and made use of a lot of left over wool from previous projects. I decided to square off the front, add a series of pass-through zippered pockets (one on the chest and one on the legs on both the outer and inner flaps), and put 2 way separating zippers on the sleeves and sides. I kept the simplicity of the tie closures at the waist, and included extra ties that can tie behind the back to sort of cinch the waist a bit. I also added some length so it would better integrate with another wool project I use as part of my cold weather sleep system.
My goal for warmth was to make the whole coat between 3 and 5 layers of wool thick everywhere. At the time these pictures were taken, it was 14 degrees outside, and I was plenty warm (except for my fingers), wearing just shorts and a tshirt under the coat.
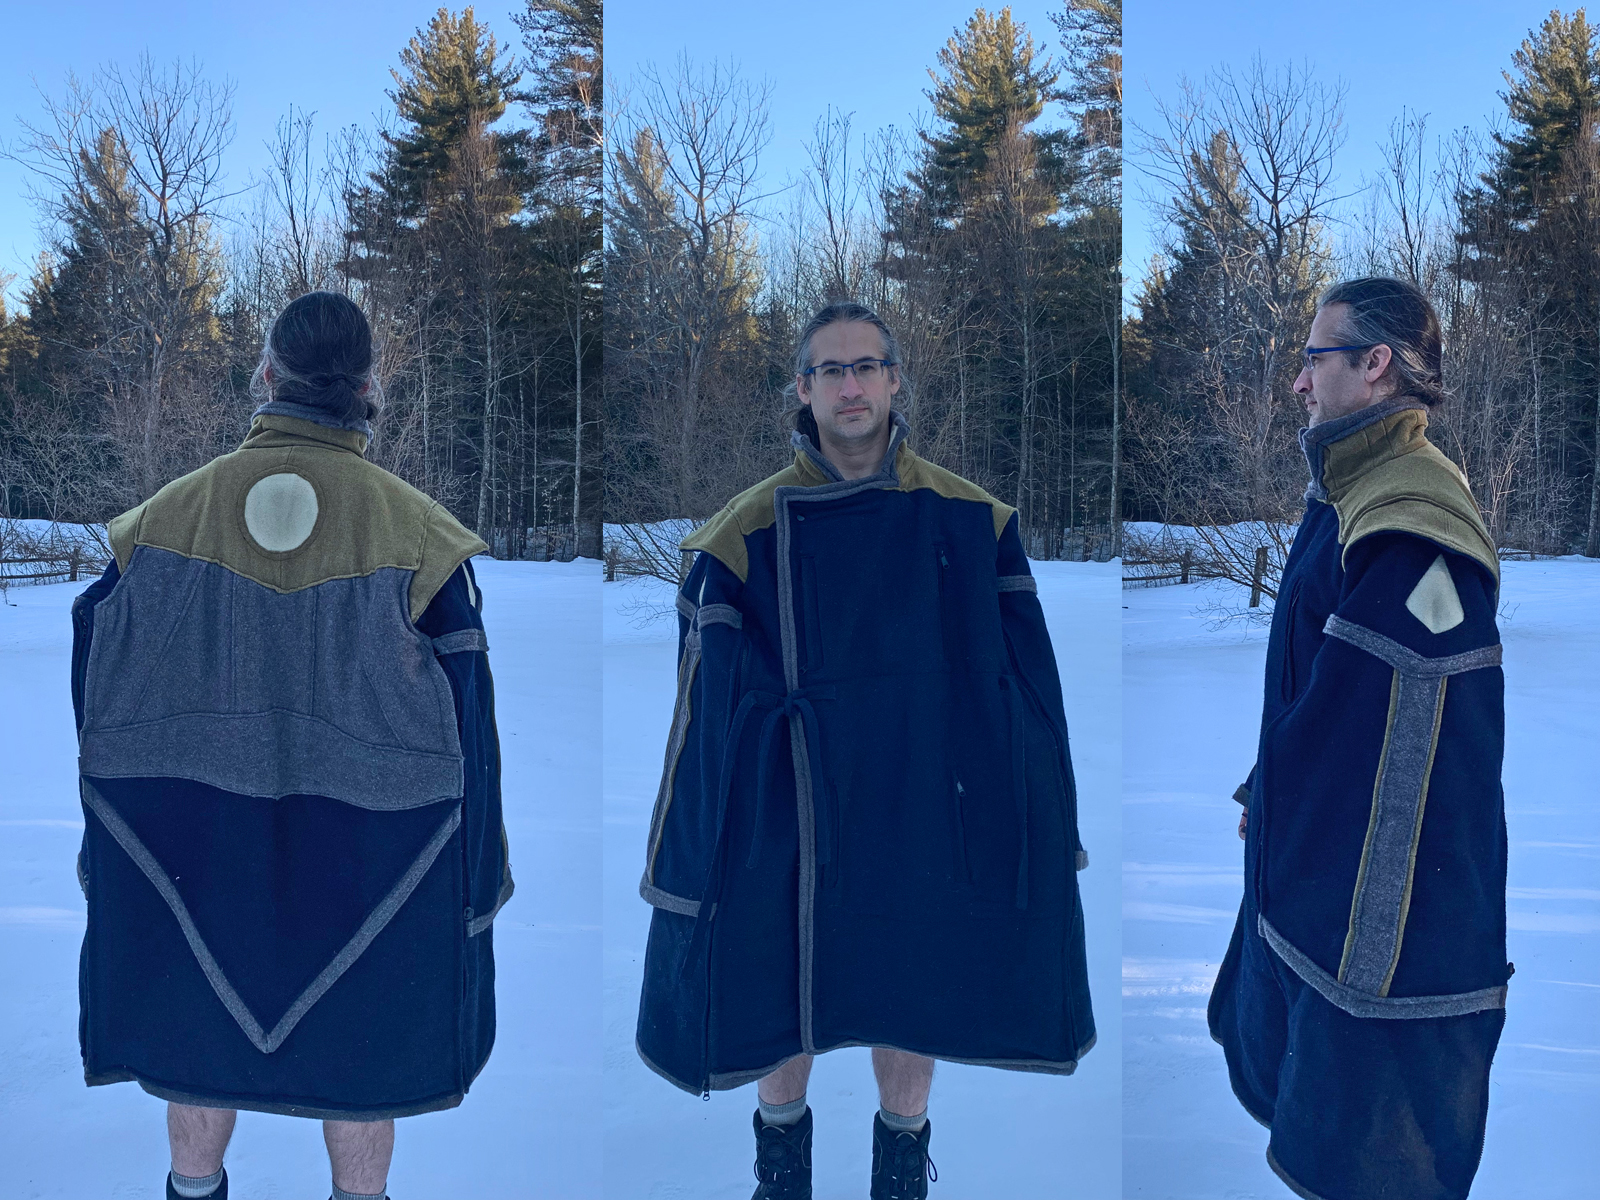
I have always really liked capes and cloaks, and I thought I could design this coat in such a way that it could transform into a cape of sorts, kind of like a fencers cloak (think 3 Musketeers…the characters, not the candy). It doesn’t quite work that well in that configuration, though. The arms would need to be much wider towards the bottom to give it a better shape, but with it being so many layers of wool, I don’t think it would flow right either way. It still might be a nice option for sleeping, though.

Some of the other features I built into the coat (from left to right):
1. Because the sides fully unzip, I can partially unzip up to the waist, allowing me to vent some excess heat as well as gain some extra range of motion for my legs if needed.
2. I call this half-cape mode, and it works a lot better than the full cape mode. It’s much closer to a fencing cloak like this, with the arms fully free for precise…fencing. And stabbing. Or something. It will be another way to vent heat when I’m hiking around. The back of the sleeves is zipped to the back of the coat, creating the “cape”, the front panels are tied together like normal, and then tied behind my back.
3. This one looks a little weird, especially when I forget to unzip the sides a little. It’s directly inspired by something I’ve noticed kung fu practitioners (at least in movies) do when they are wearing their long coats but need to start kicking people. I added two ties at each of the corners of the front so I can just tie them up behind me. Once again, vents some heat and also increases my range of motion for kicking bad guys in the head (because you never know).
Here’s a little peak at how the sleeve works. It has a separating 2 way zipper, and it’s the same length as the body of the coat. Obviously, that’s too long for a sleeve in coat mode, so I have a line of snaps to fold the excess inside. This makes the lower portion of the sleeve 5 layers thick. This also made it very tough to bend my arms. So, I’ve been double folding the excess to keep it away from my elbow, and it’s much less of an issue. I may go add another row of snaps to accommodate that. I did add a shock cord cinch at the wrists to try to gather some of the bulk, but the wool is too thick (I should have gone with an internal webbing belt like I originally thought of, but I couldn’t come up with a way to do it without some kind of bulky buckle to adjust it with). The extra layers of wool pretty much seal off the cuff, which is good, but, it makes the cuff very inflexible (I’m hoping/expecting that to soften up with wear a little), so I have to pay attention when reaching for things (very easy to knock things over). I can always just unzip the sleeve from the wrist to the elbow when I need more dexterity, though.
Here’s a look at some of the “details”:

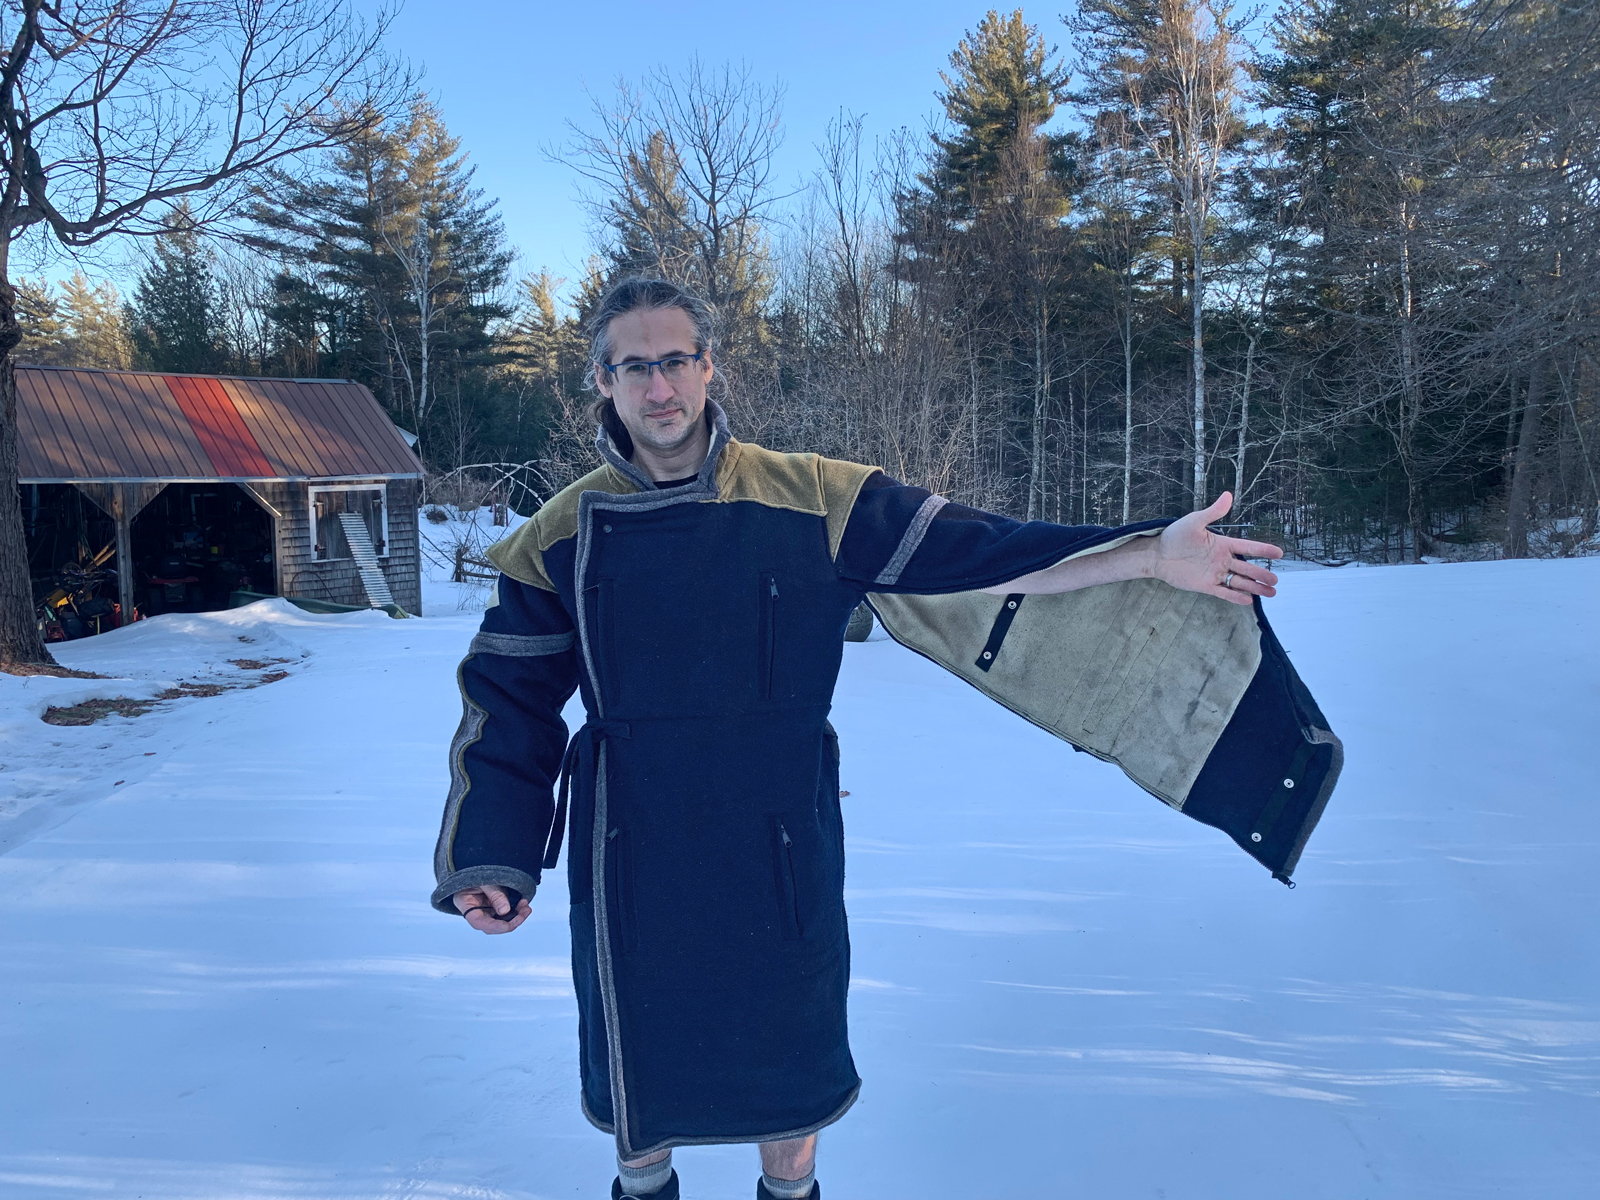
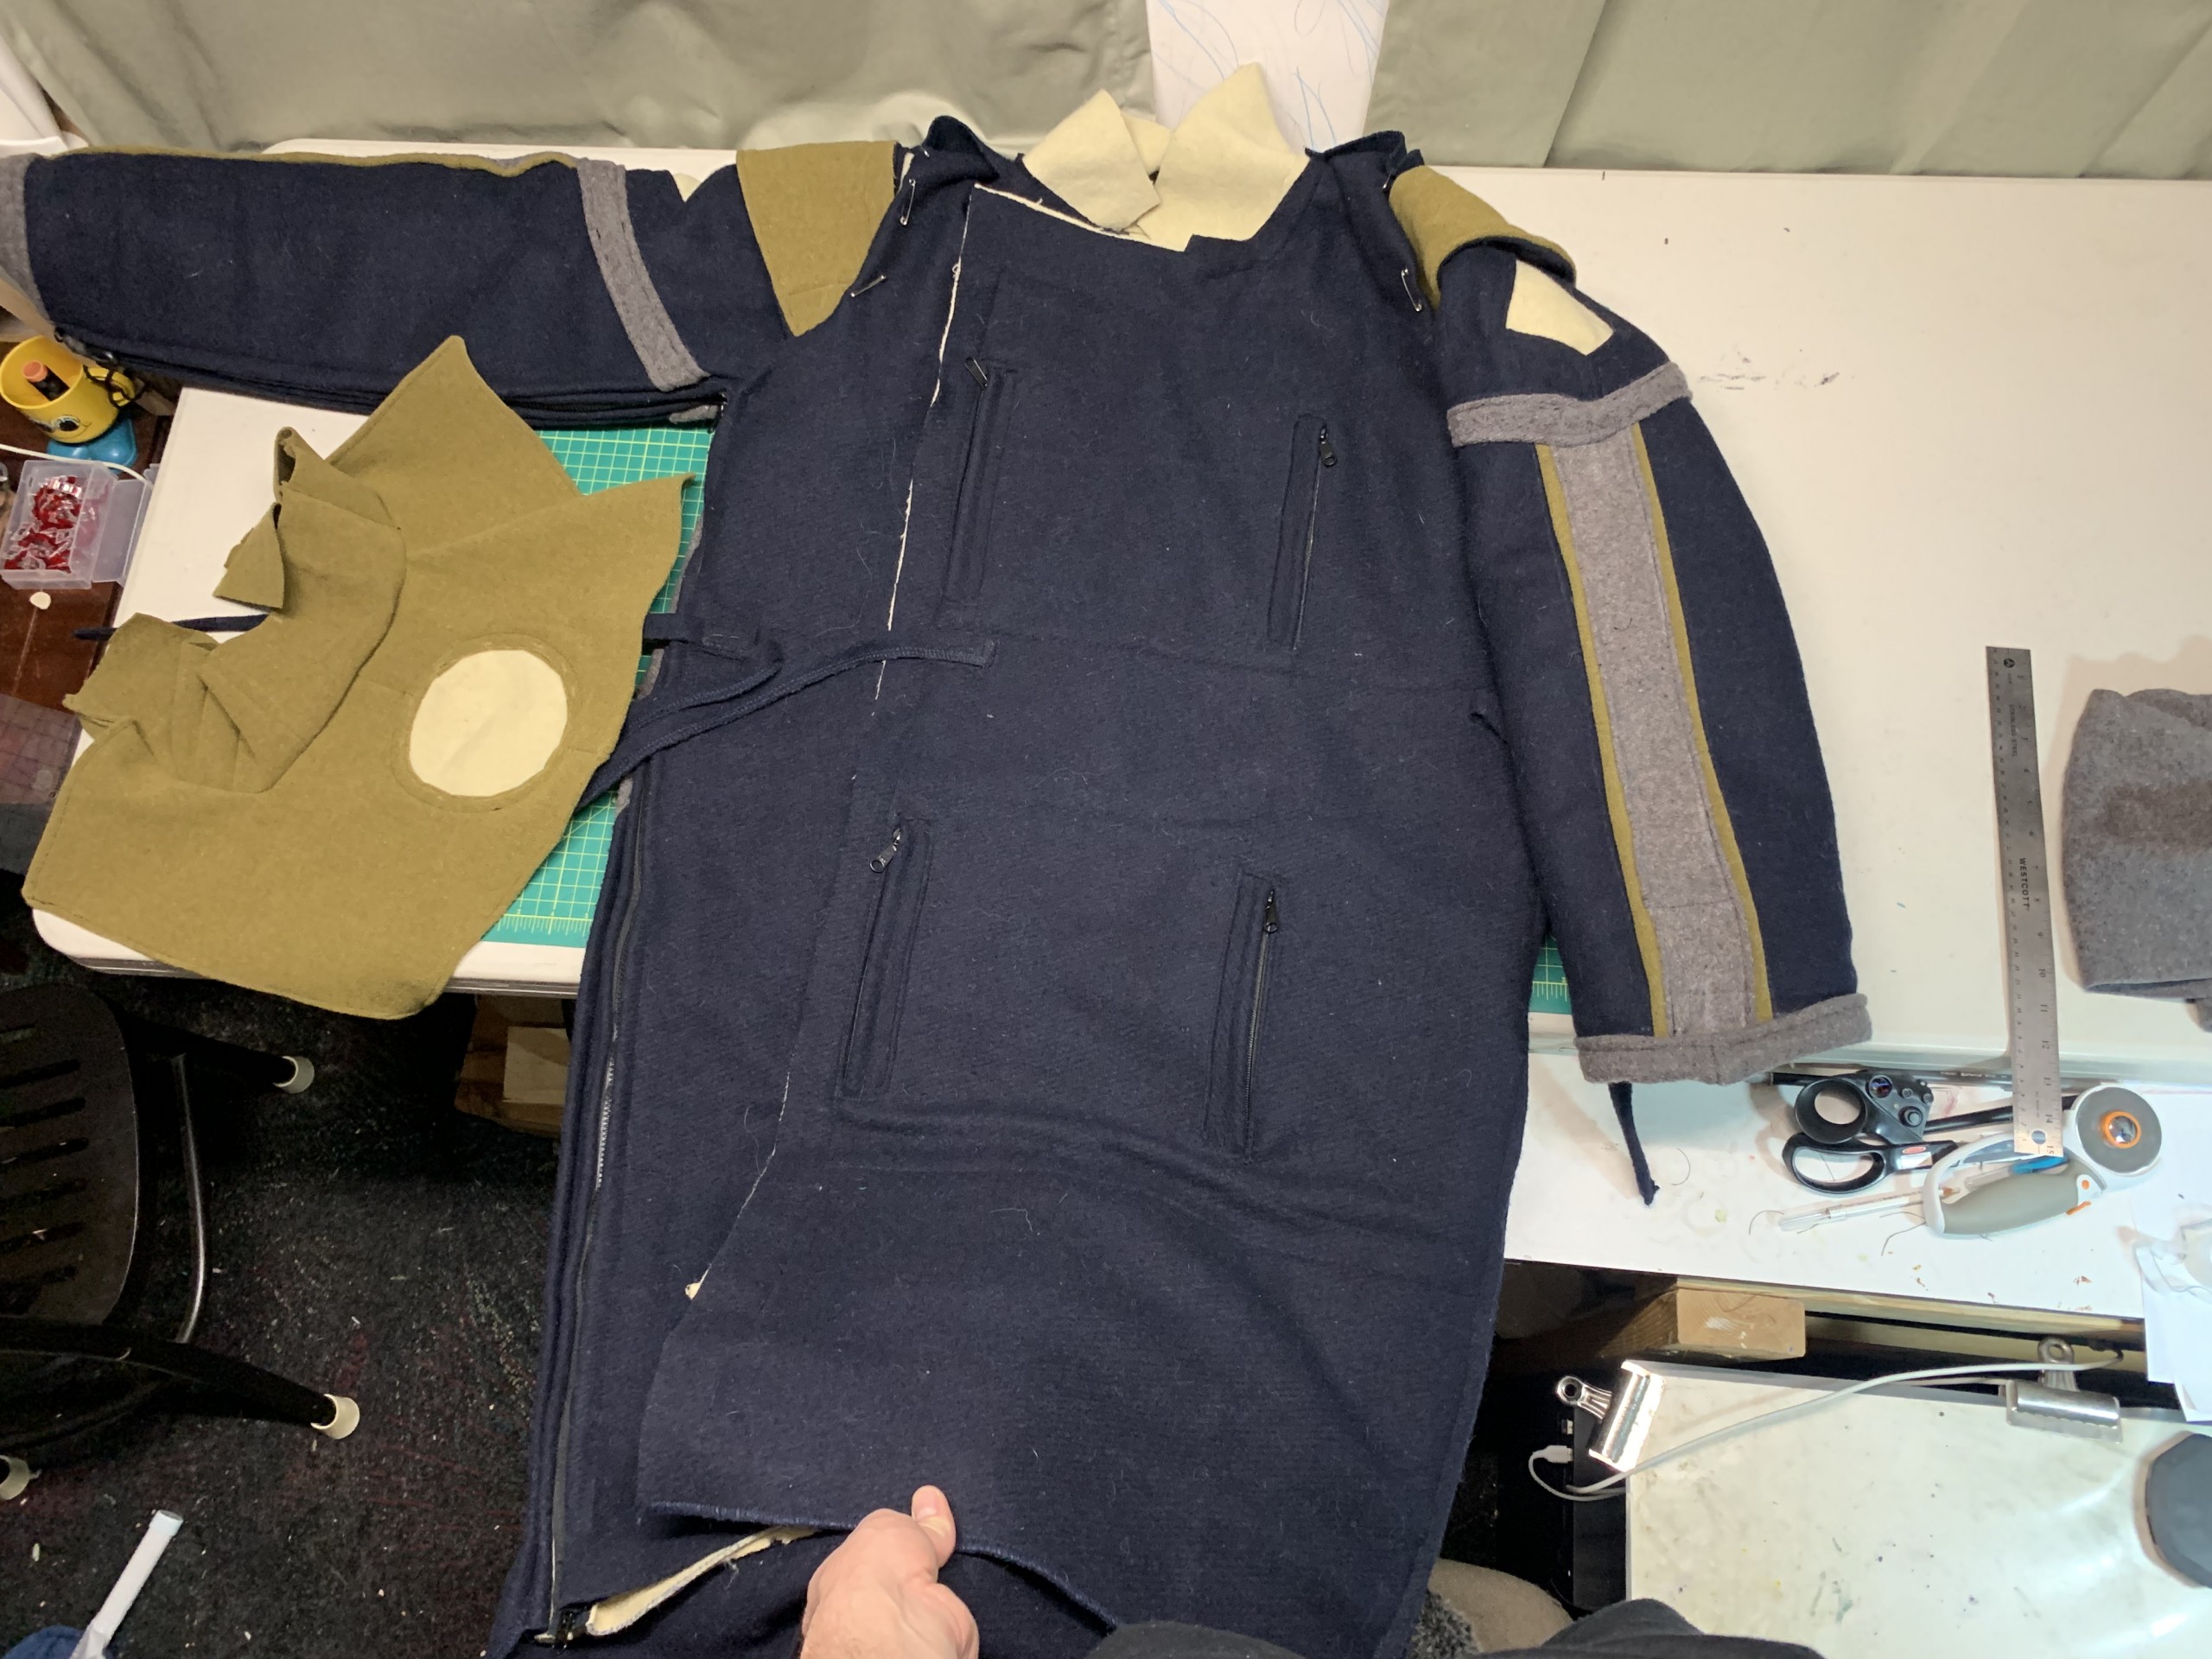
There’s a chest pocket and a lap pocket on each flap, each with zippered access from the left and right (so they are pass-through pockets).
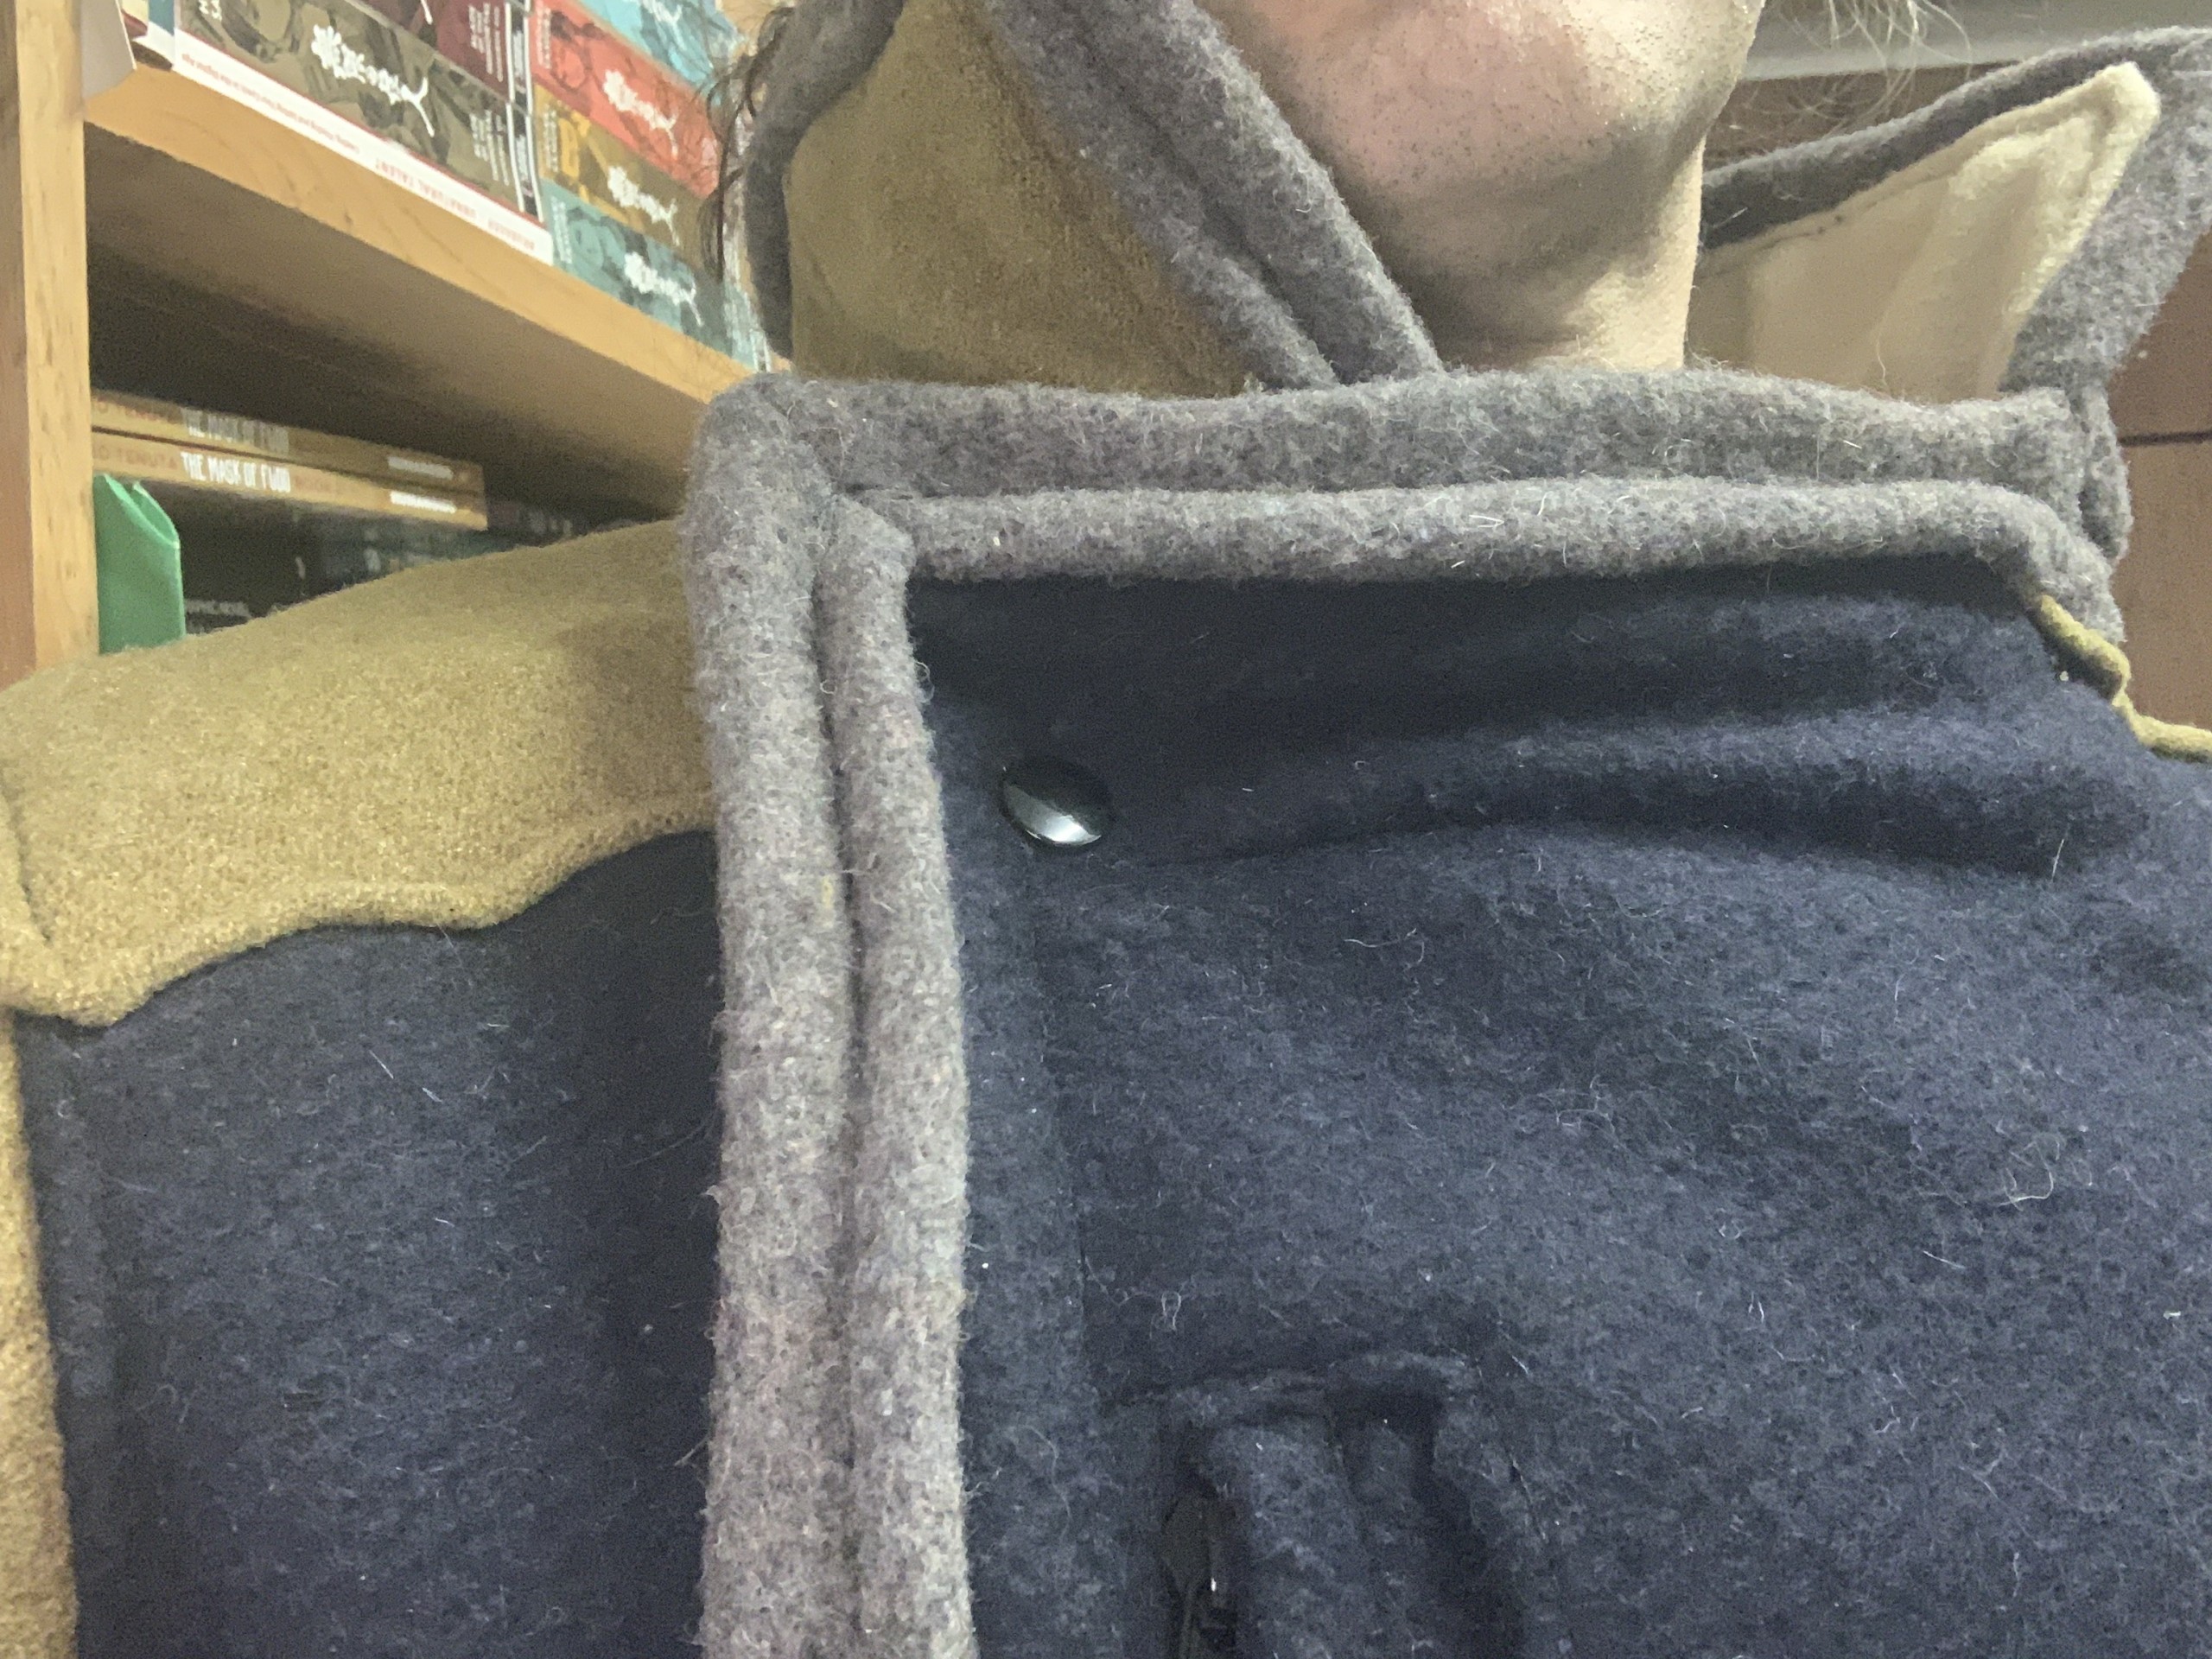
Currently, there’s one snap up near the collar to keep the top corner “closed”. I may add more, or devise a slightly different system that won’t pop loose so easily. I realized I couldn’t add more snaps down the trim side like I originally planned because of the placement of the zippered pockets, and this single snap works okay, but if I stuff my hand into the chest pocket to retrieve something, it sometimes unsnaps.
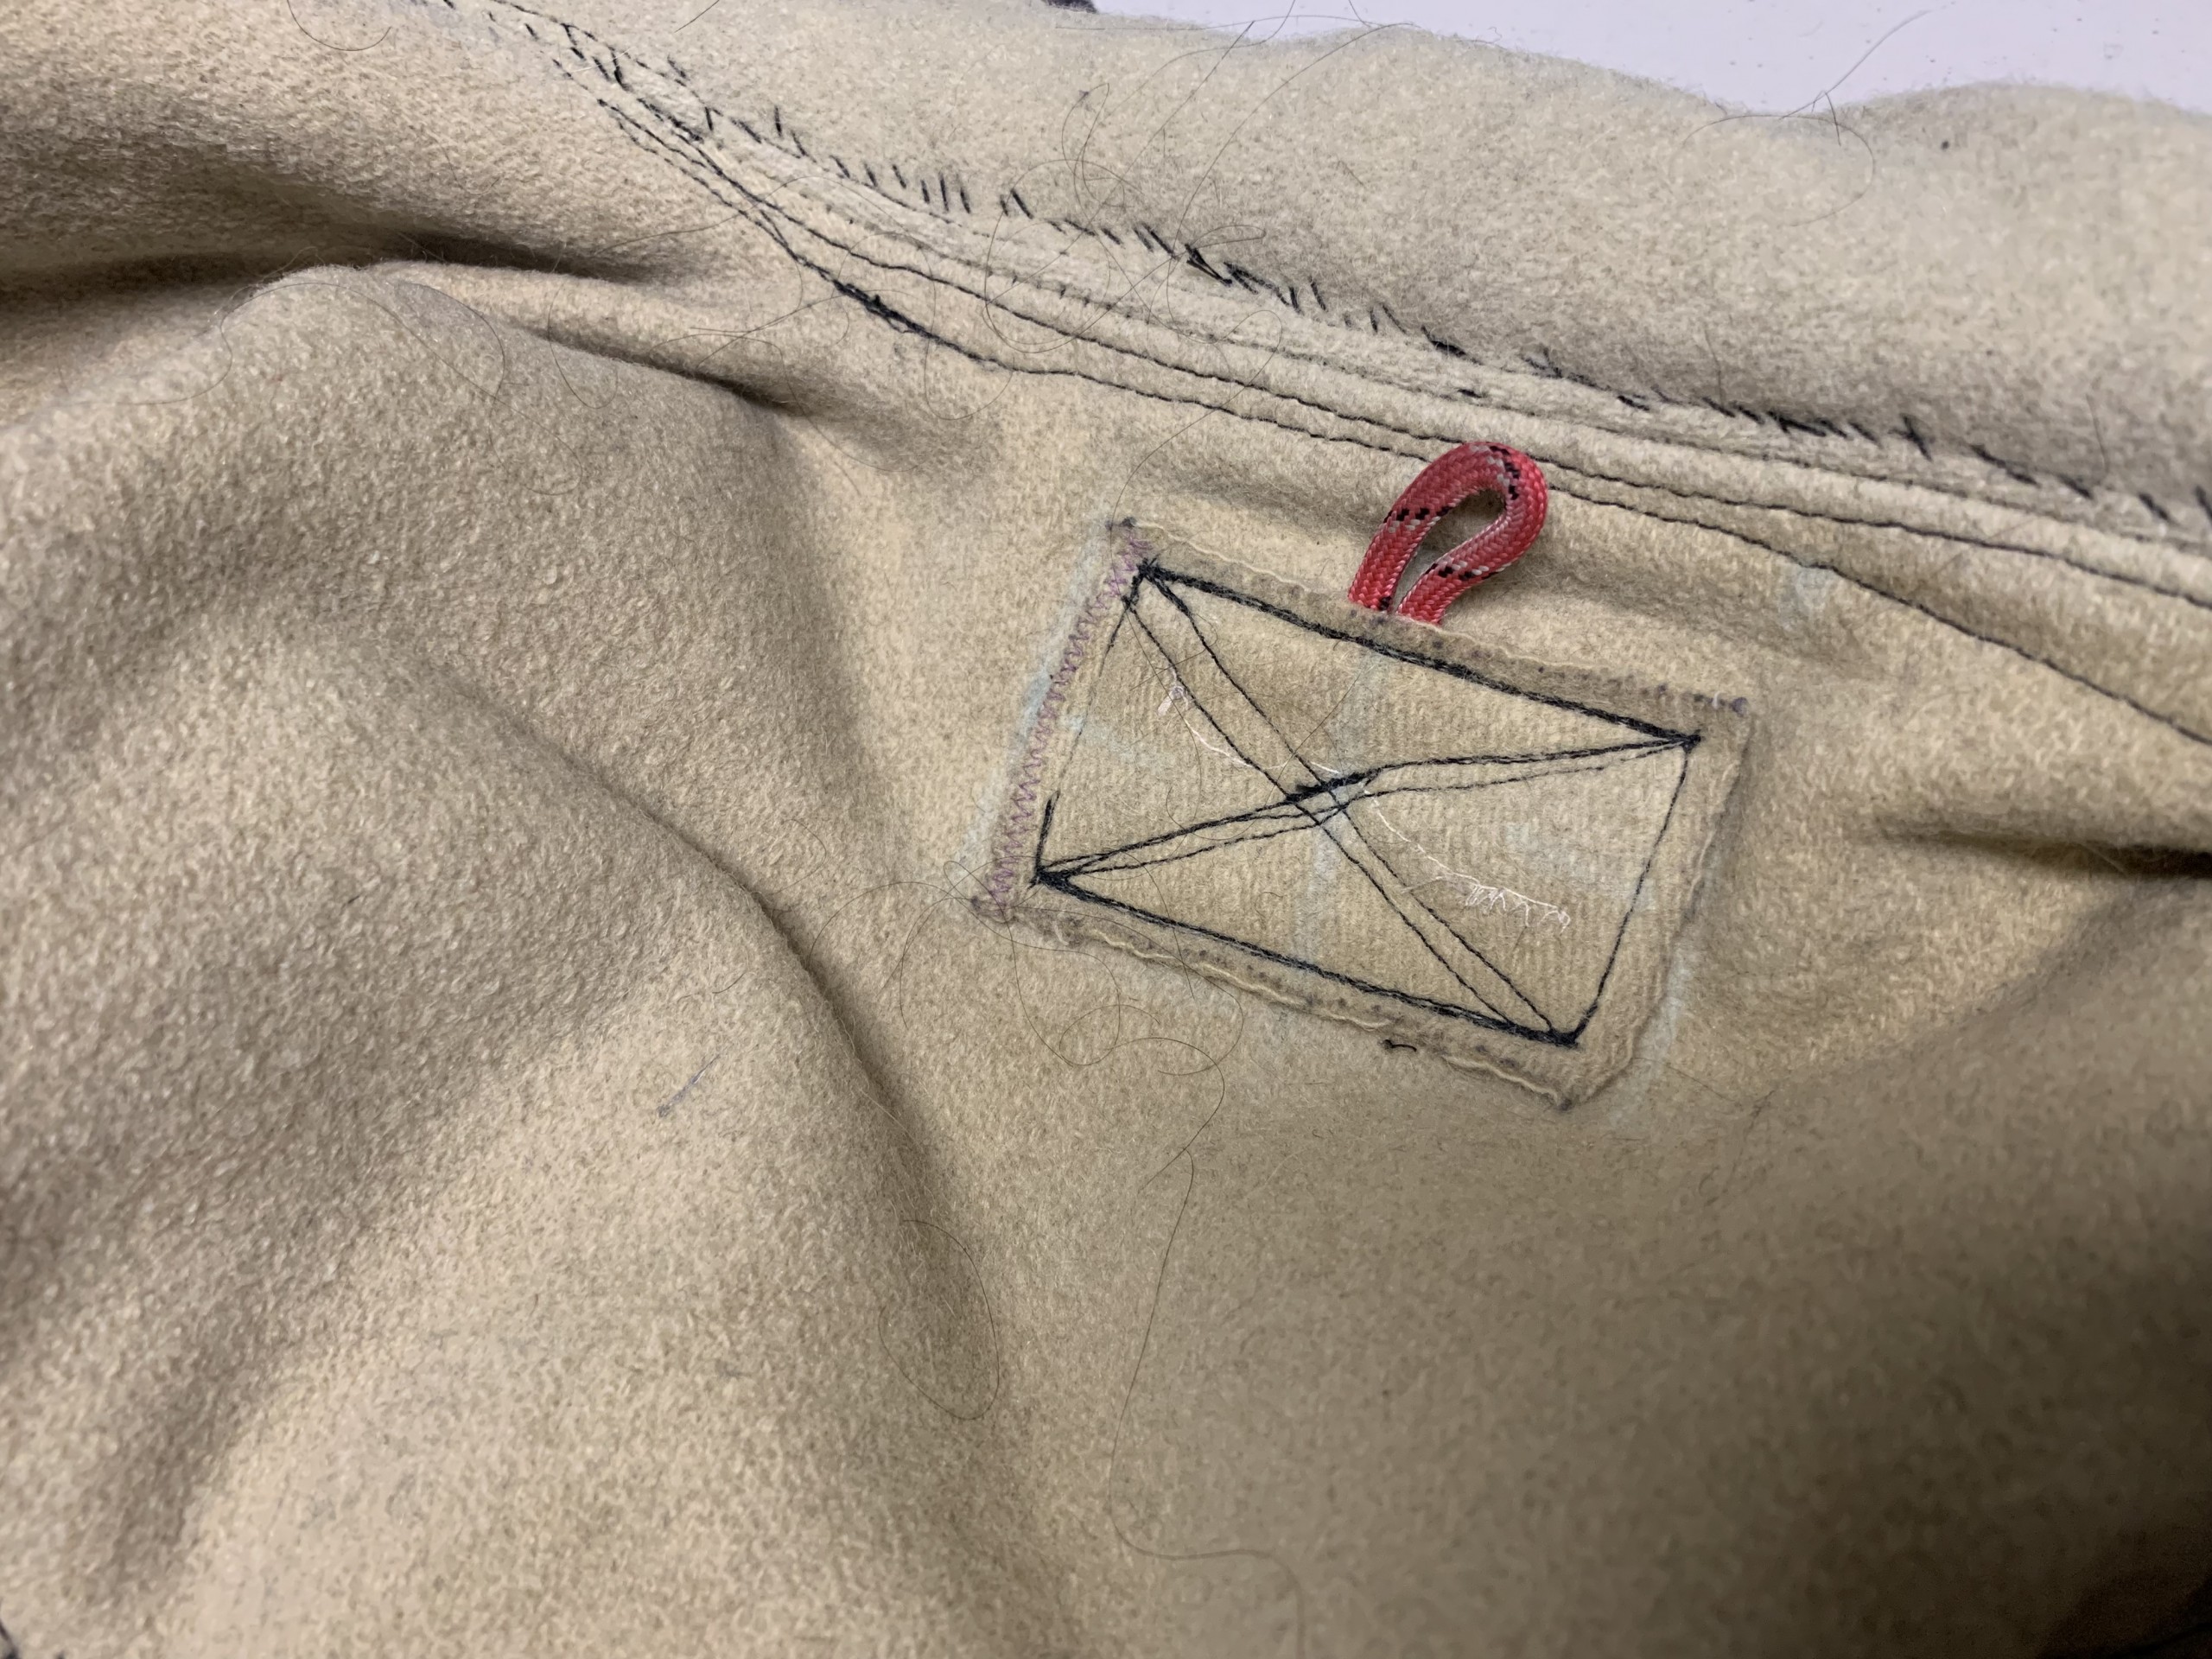
The original wool gi coat is white and had this paracord loop for hanging it that I made. I restitched it and beefed it up a little in hopes that it will bear the extra weight of all the wool.
Don’t look too closely at some of my hand stitching here…it’s not pretty.
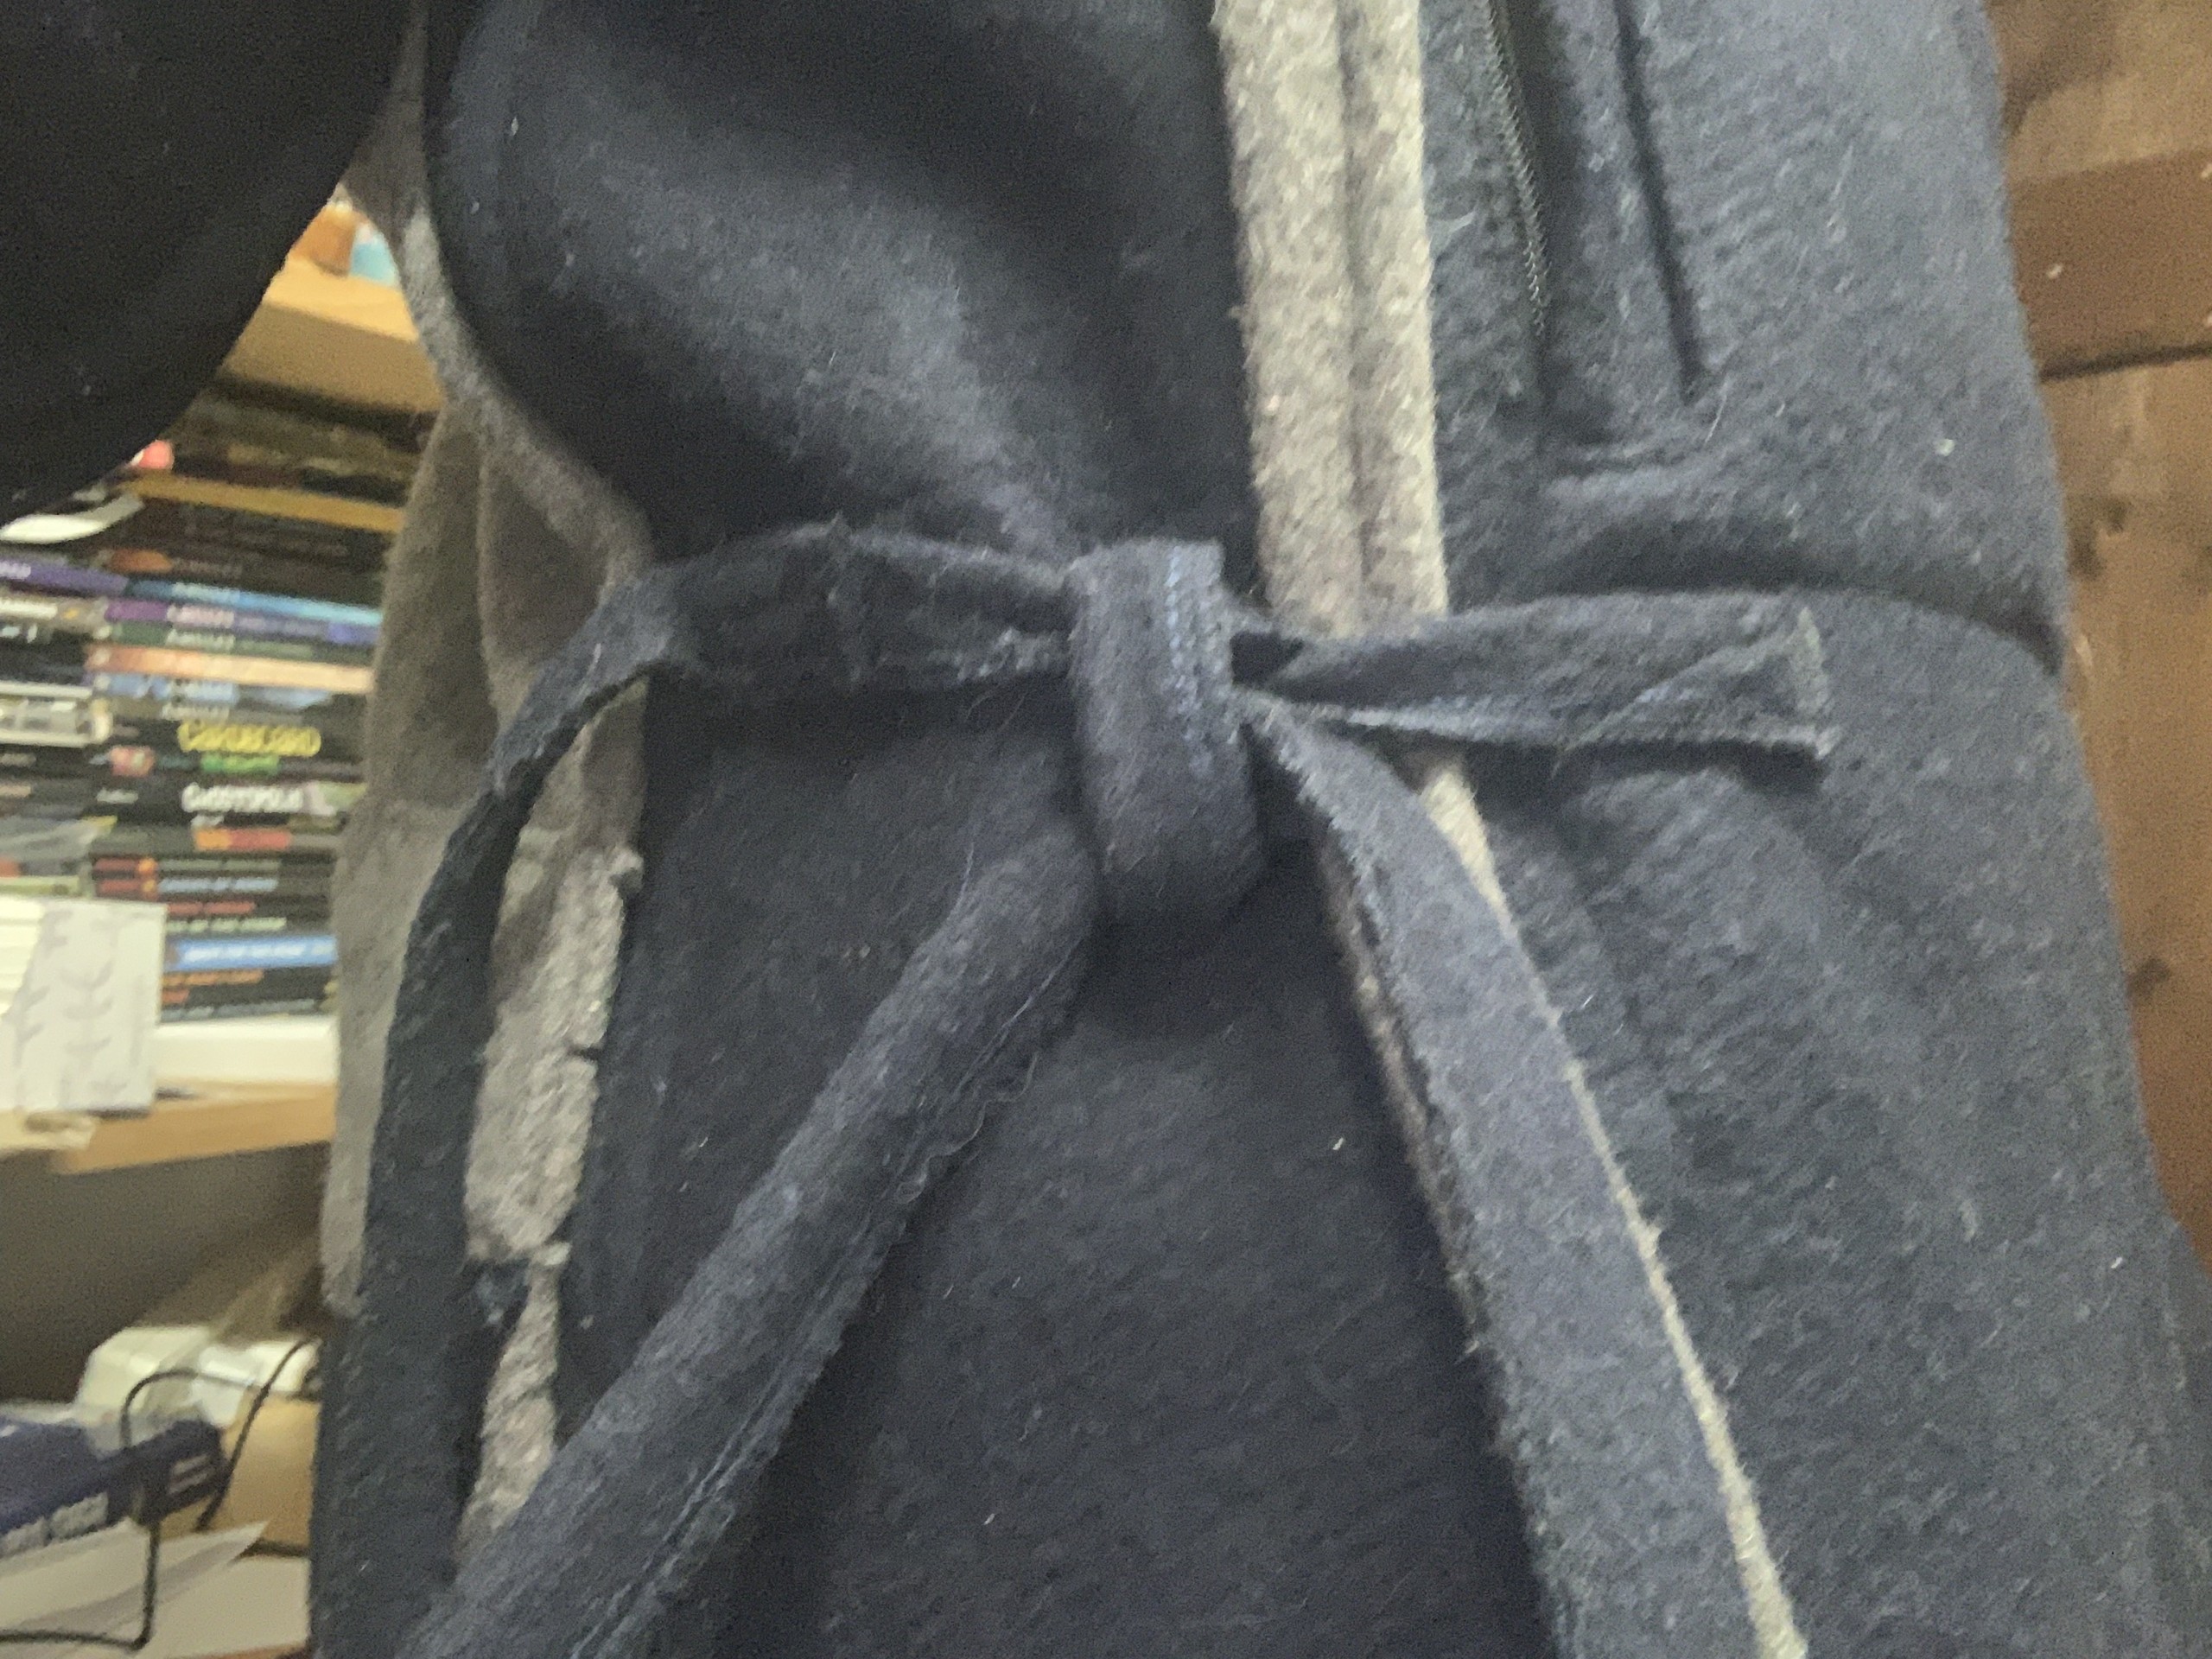
Close up of one of the tie closures.
If I tallied my hours correctly, this project, not including the initial brainstorming and doodling, took a whopping 127 hours and 32 minutes, beginning on January 1, 2022. Pretty much the only other thing I did during this time was work on Inside Toby’s Brain. If I had to make another one of these, I might be able to do it faster, but probably not by much, especially if I had to size it up or down. This was a ton of work, but enjoyable, particularly because I have something tangible to use at the end of it (and something that should last me for a very long time). It’s also easily the nicest, most “finished” thing I’ve constructed. I gave myself headaches trying to ensure there were no rough edges or unfinished seams anywhere, all while trying to minimize unnecessary bulk. It was not easy (and I wasn’t 100% successful, but pretty darn close). I also used up a ton of remnant wool from previous projects that had no other practical use, so it’s an eco-friendly coat too…or something.
Speaking of all the work, here’s some pictures I took along the way. I thought about filming parts of the process, and shooting a video of the finished project, but both would just add more time to this endeavor without any payoff. I like sewing, it’s a hobby. It’s a nice break from other creative pursuits. At one point I thought documenting and sharing some of my sewing adventures would be a means to draw attention to what I do in general, but I think I’ve realized that’s unlikely, other than the brief conversations it sparks with strangers when I’m out in public (which would be really handy to have business cards printed for…I just had a guy today ask me for a card after a little chat about this coat and my Everyday Utility Belt when I was taking my son to the doctor…). The act of filming the process, or a “reveal” video at the finish, adds a ton of extra time and work planning and setting up to film, and then editing. A few captioned pictures snapped at the end of a work session along the way? That’s a little more manageable.
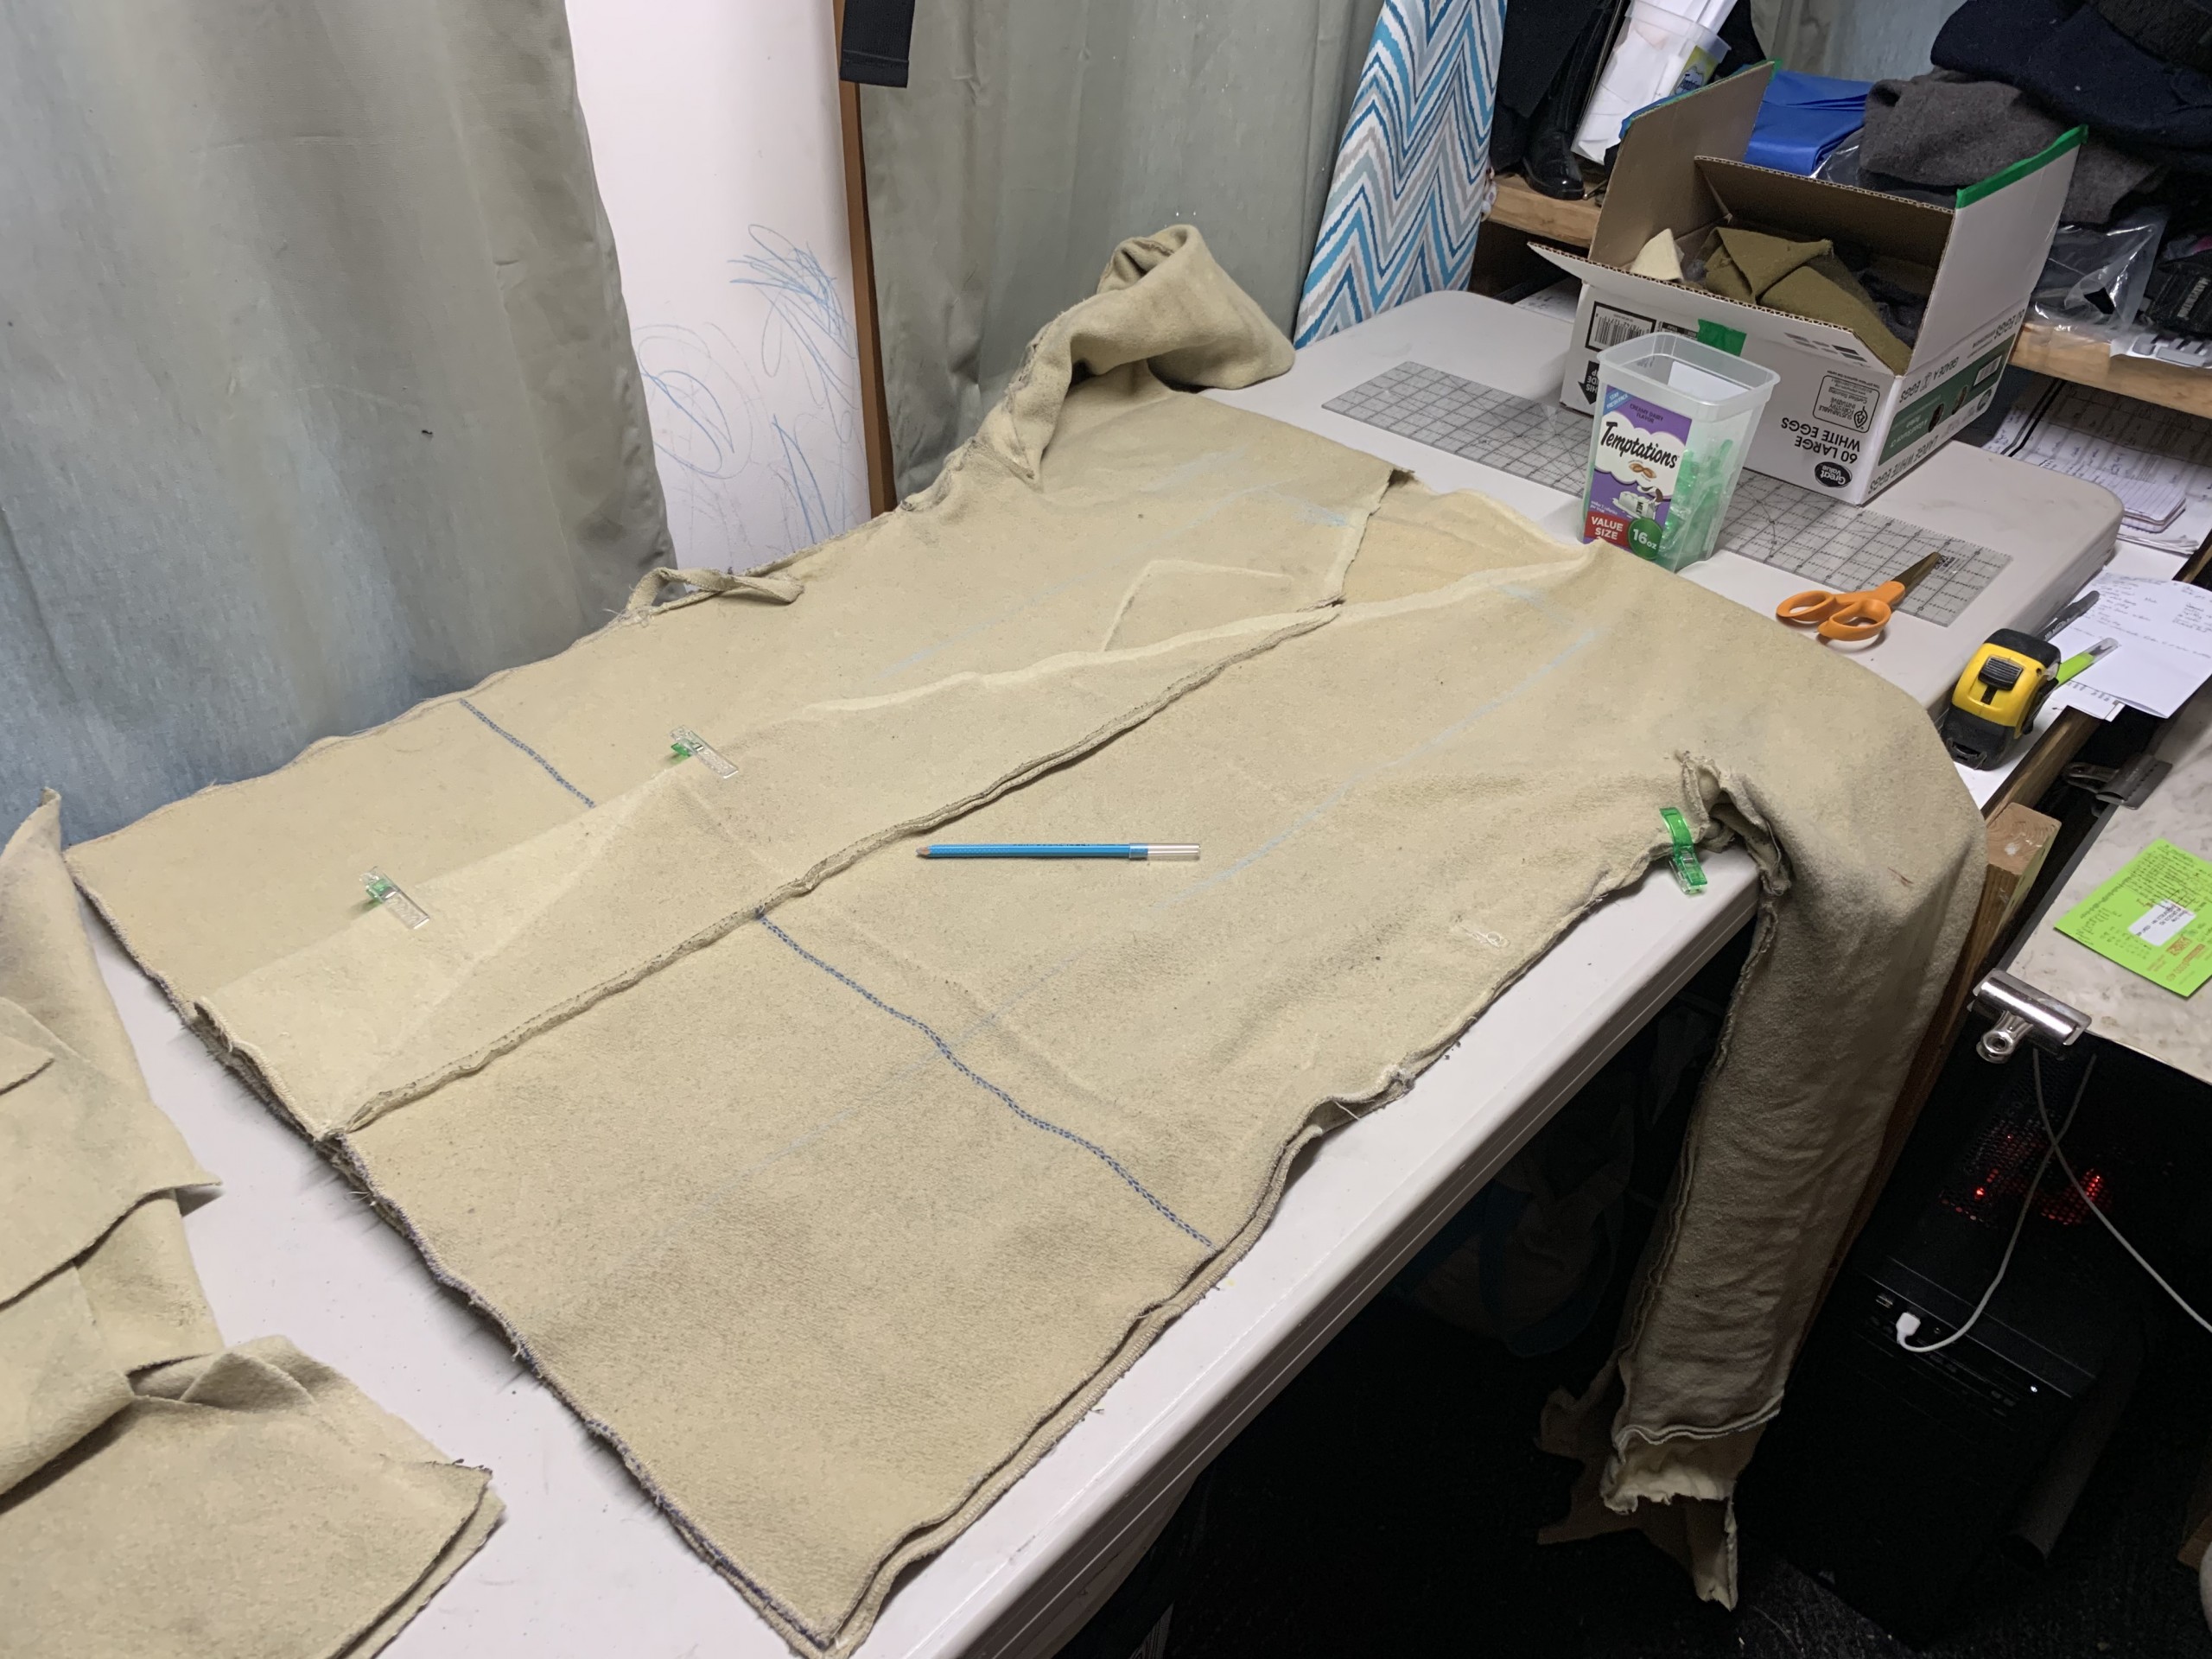
The original wool gi coat I made years ago, in a state of disassembly/reassembly.
I squared off the front and then started thinking about stitching down the seam excess to reduce bulky areas.
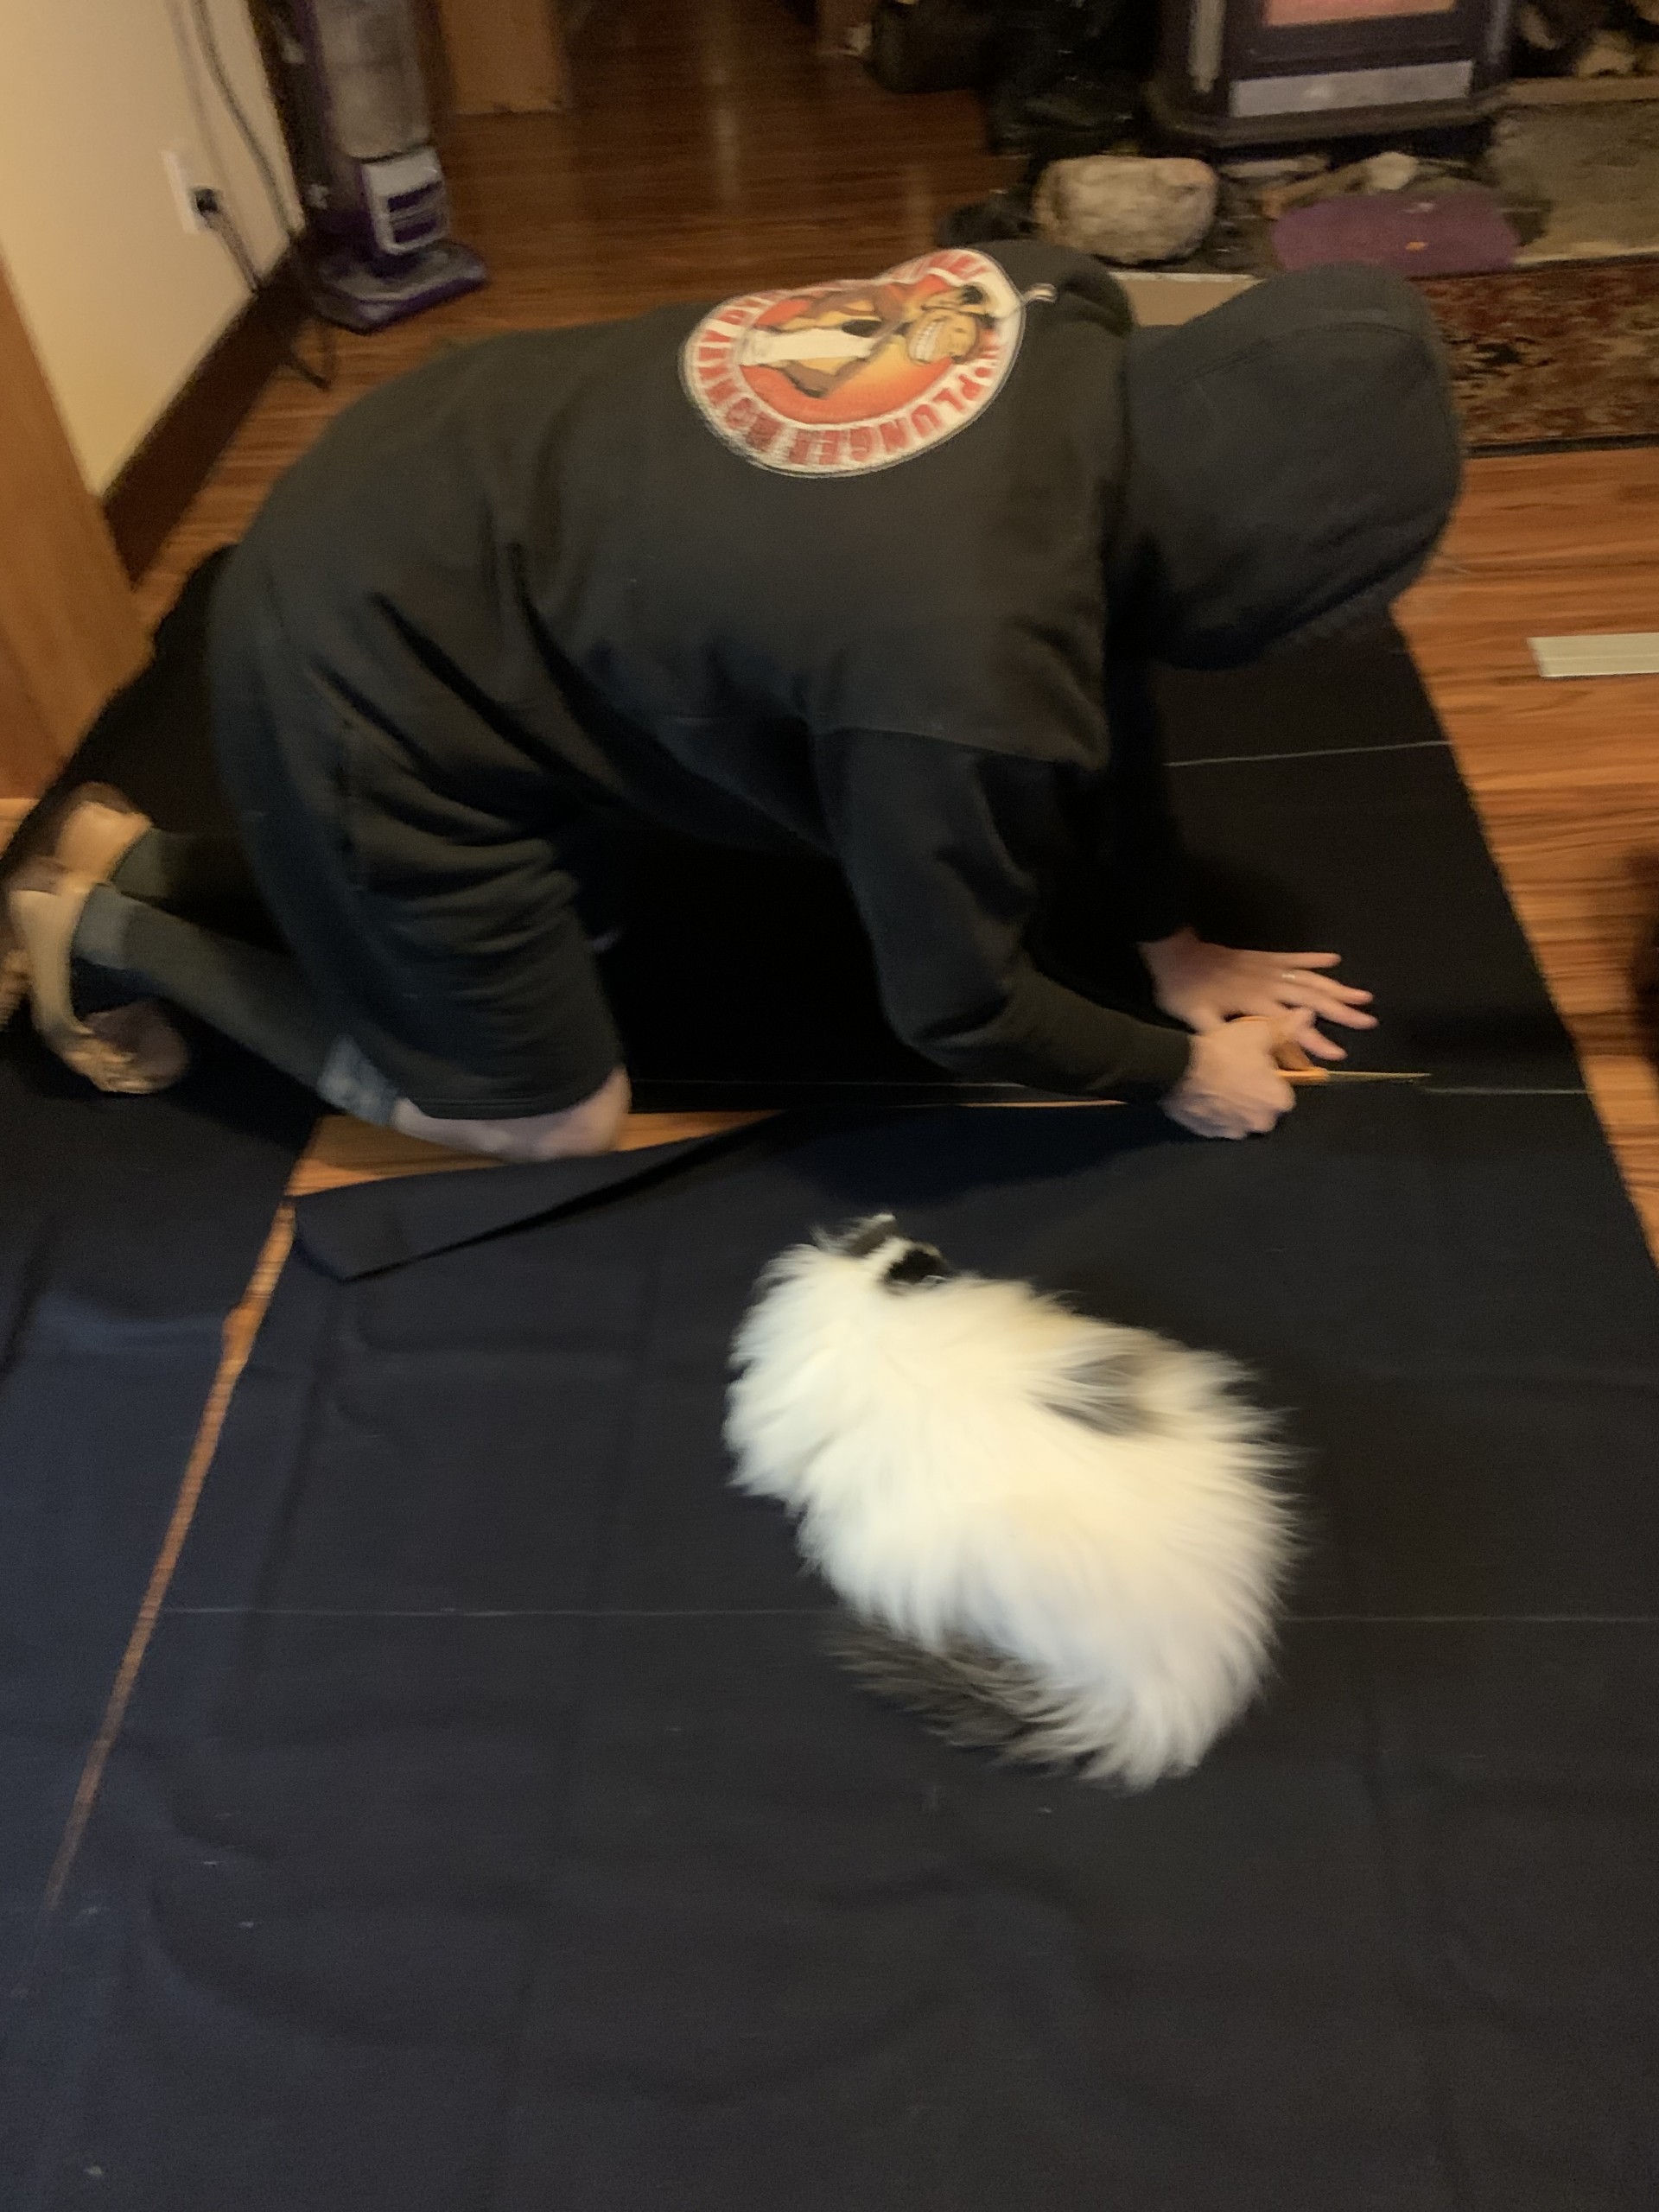
Po supervising the cutting of wool.
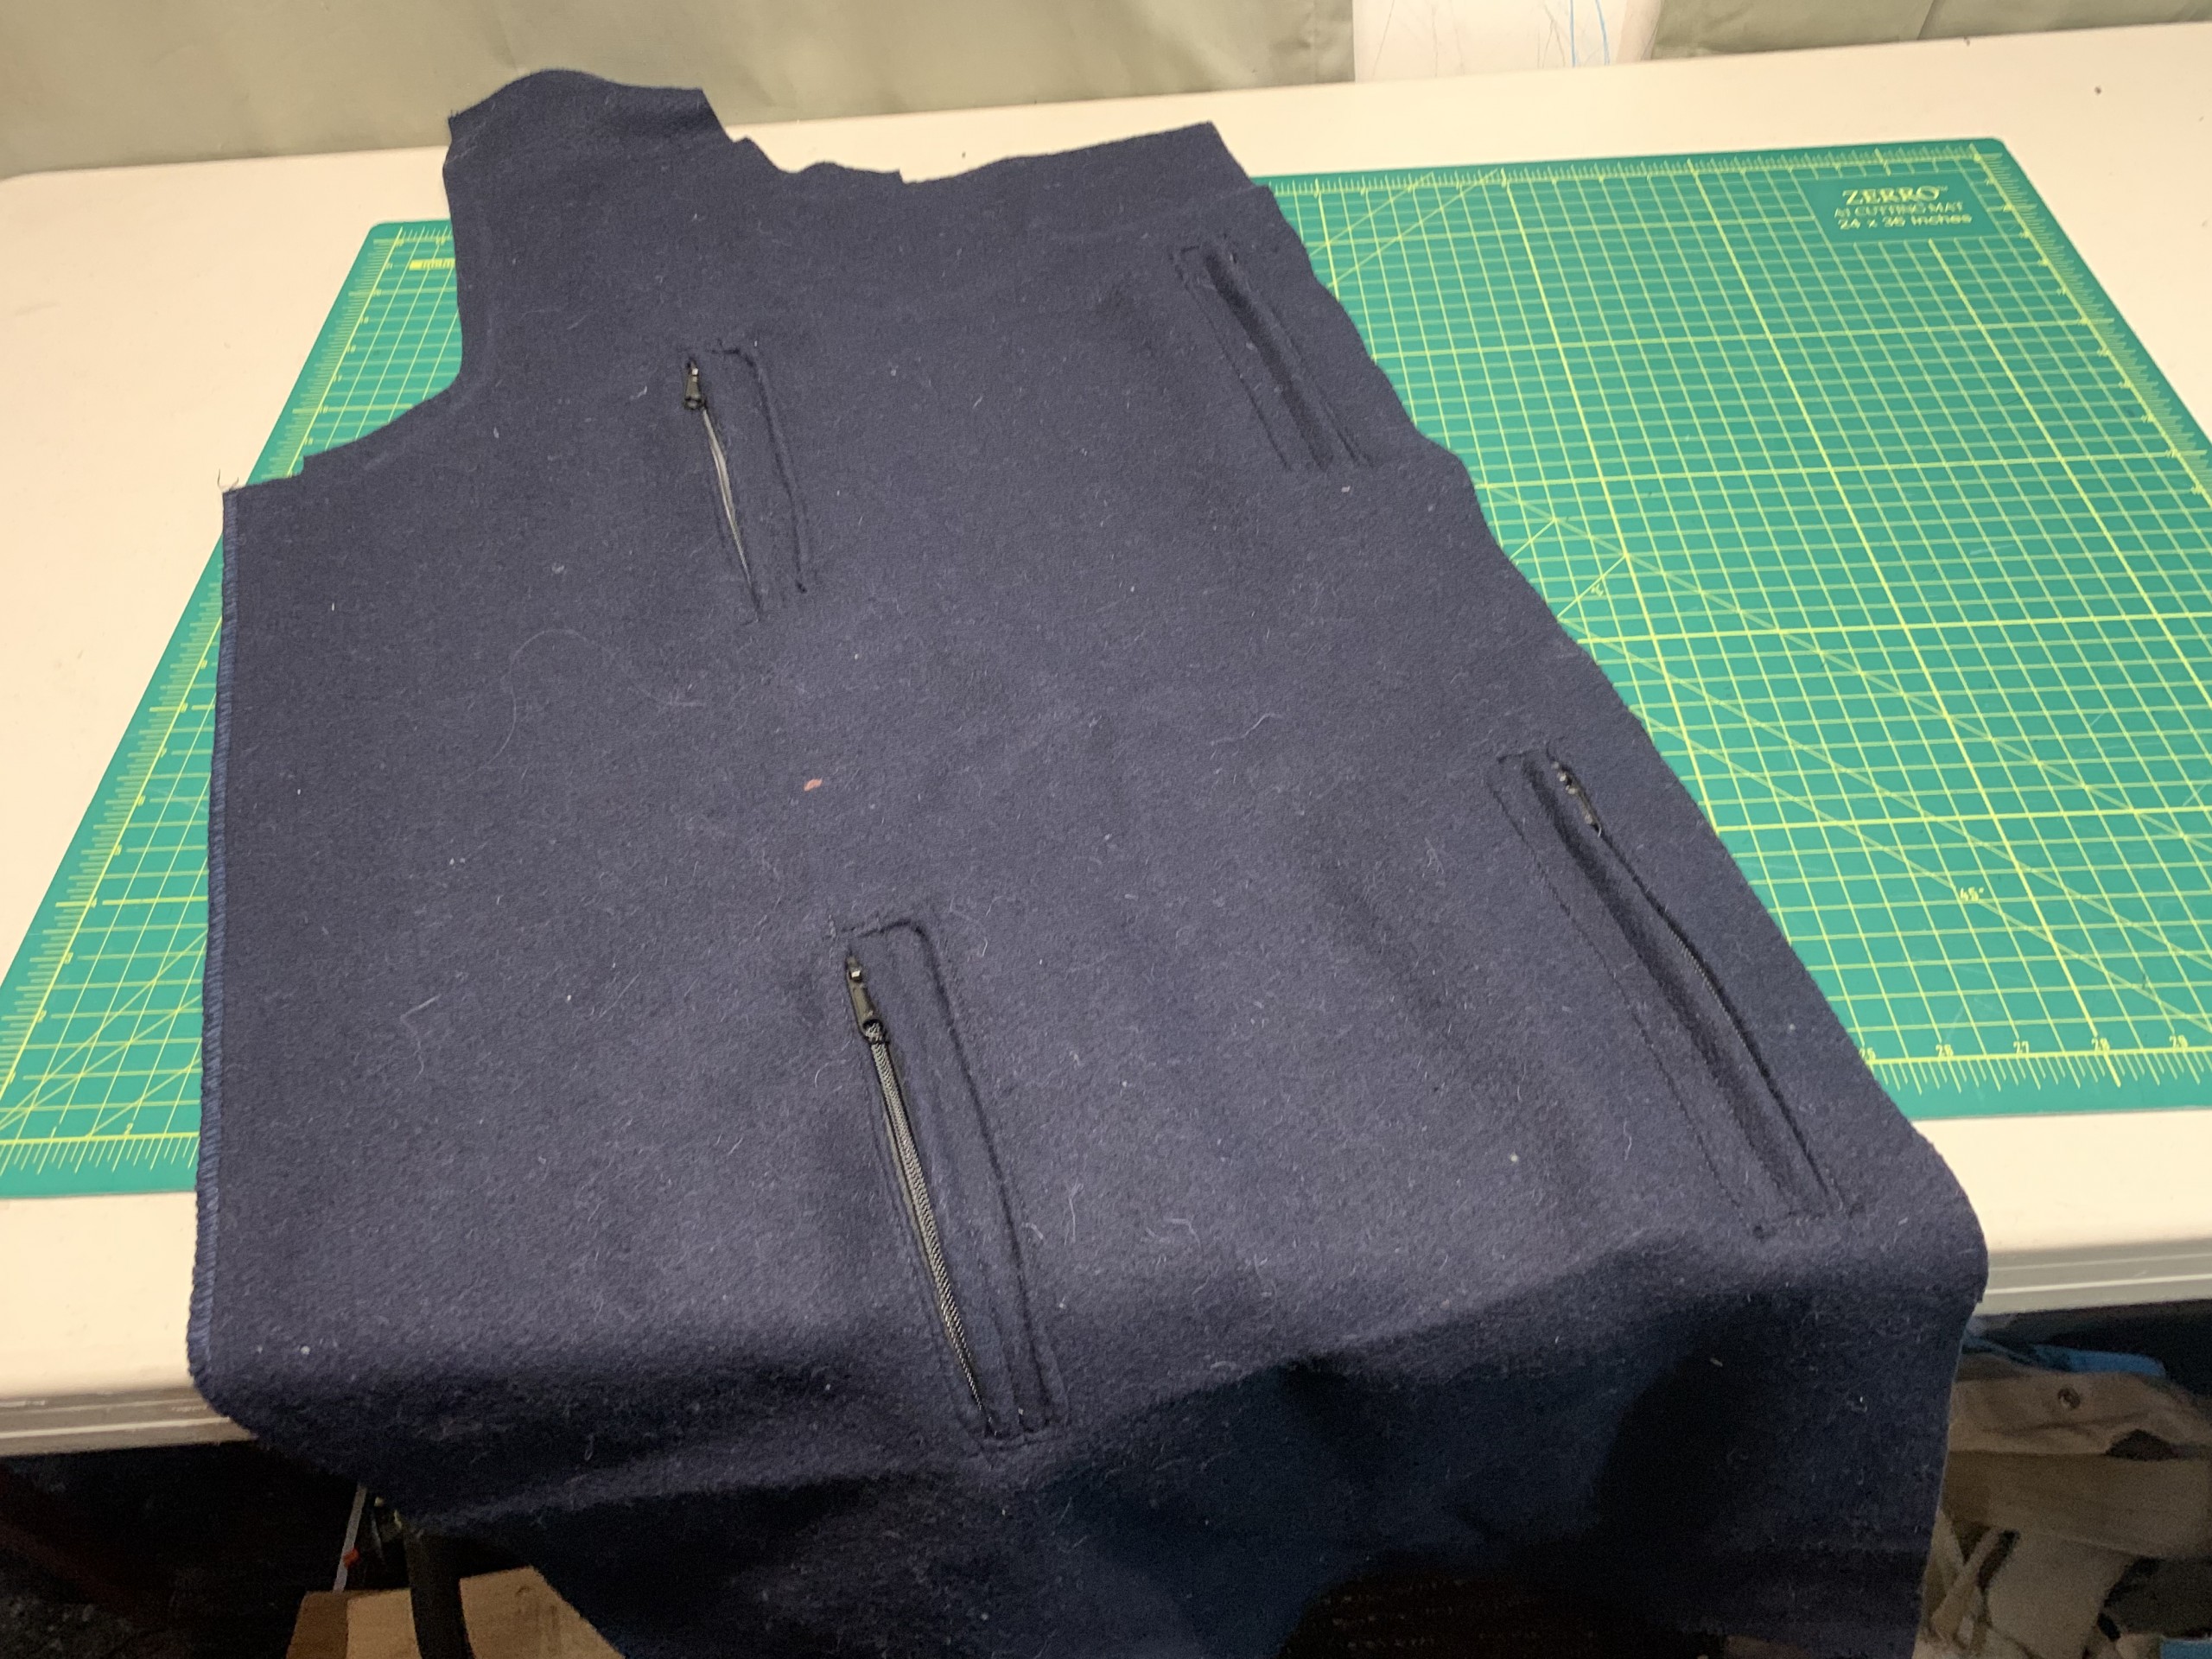
Four welted zipper openings on one of the front panels. They aren’t as complicated to do as I once thought, and they look nice.

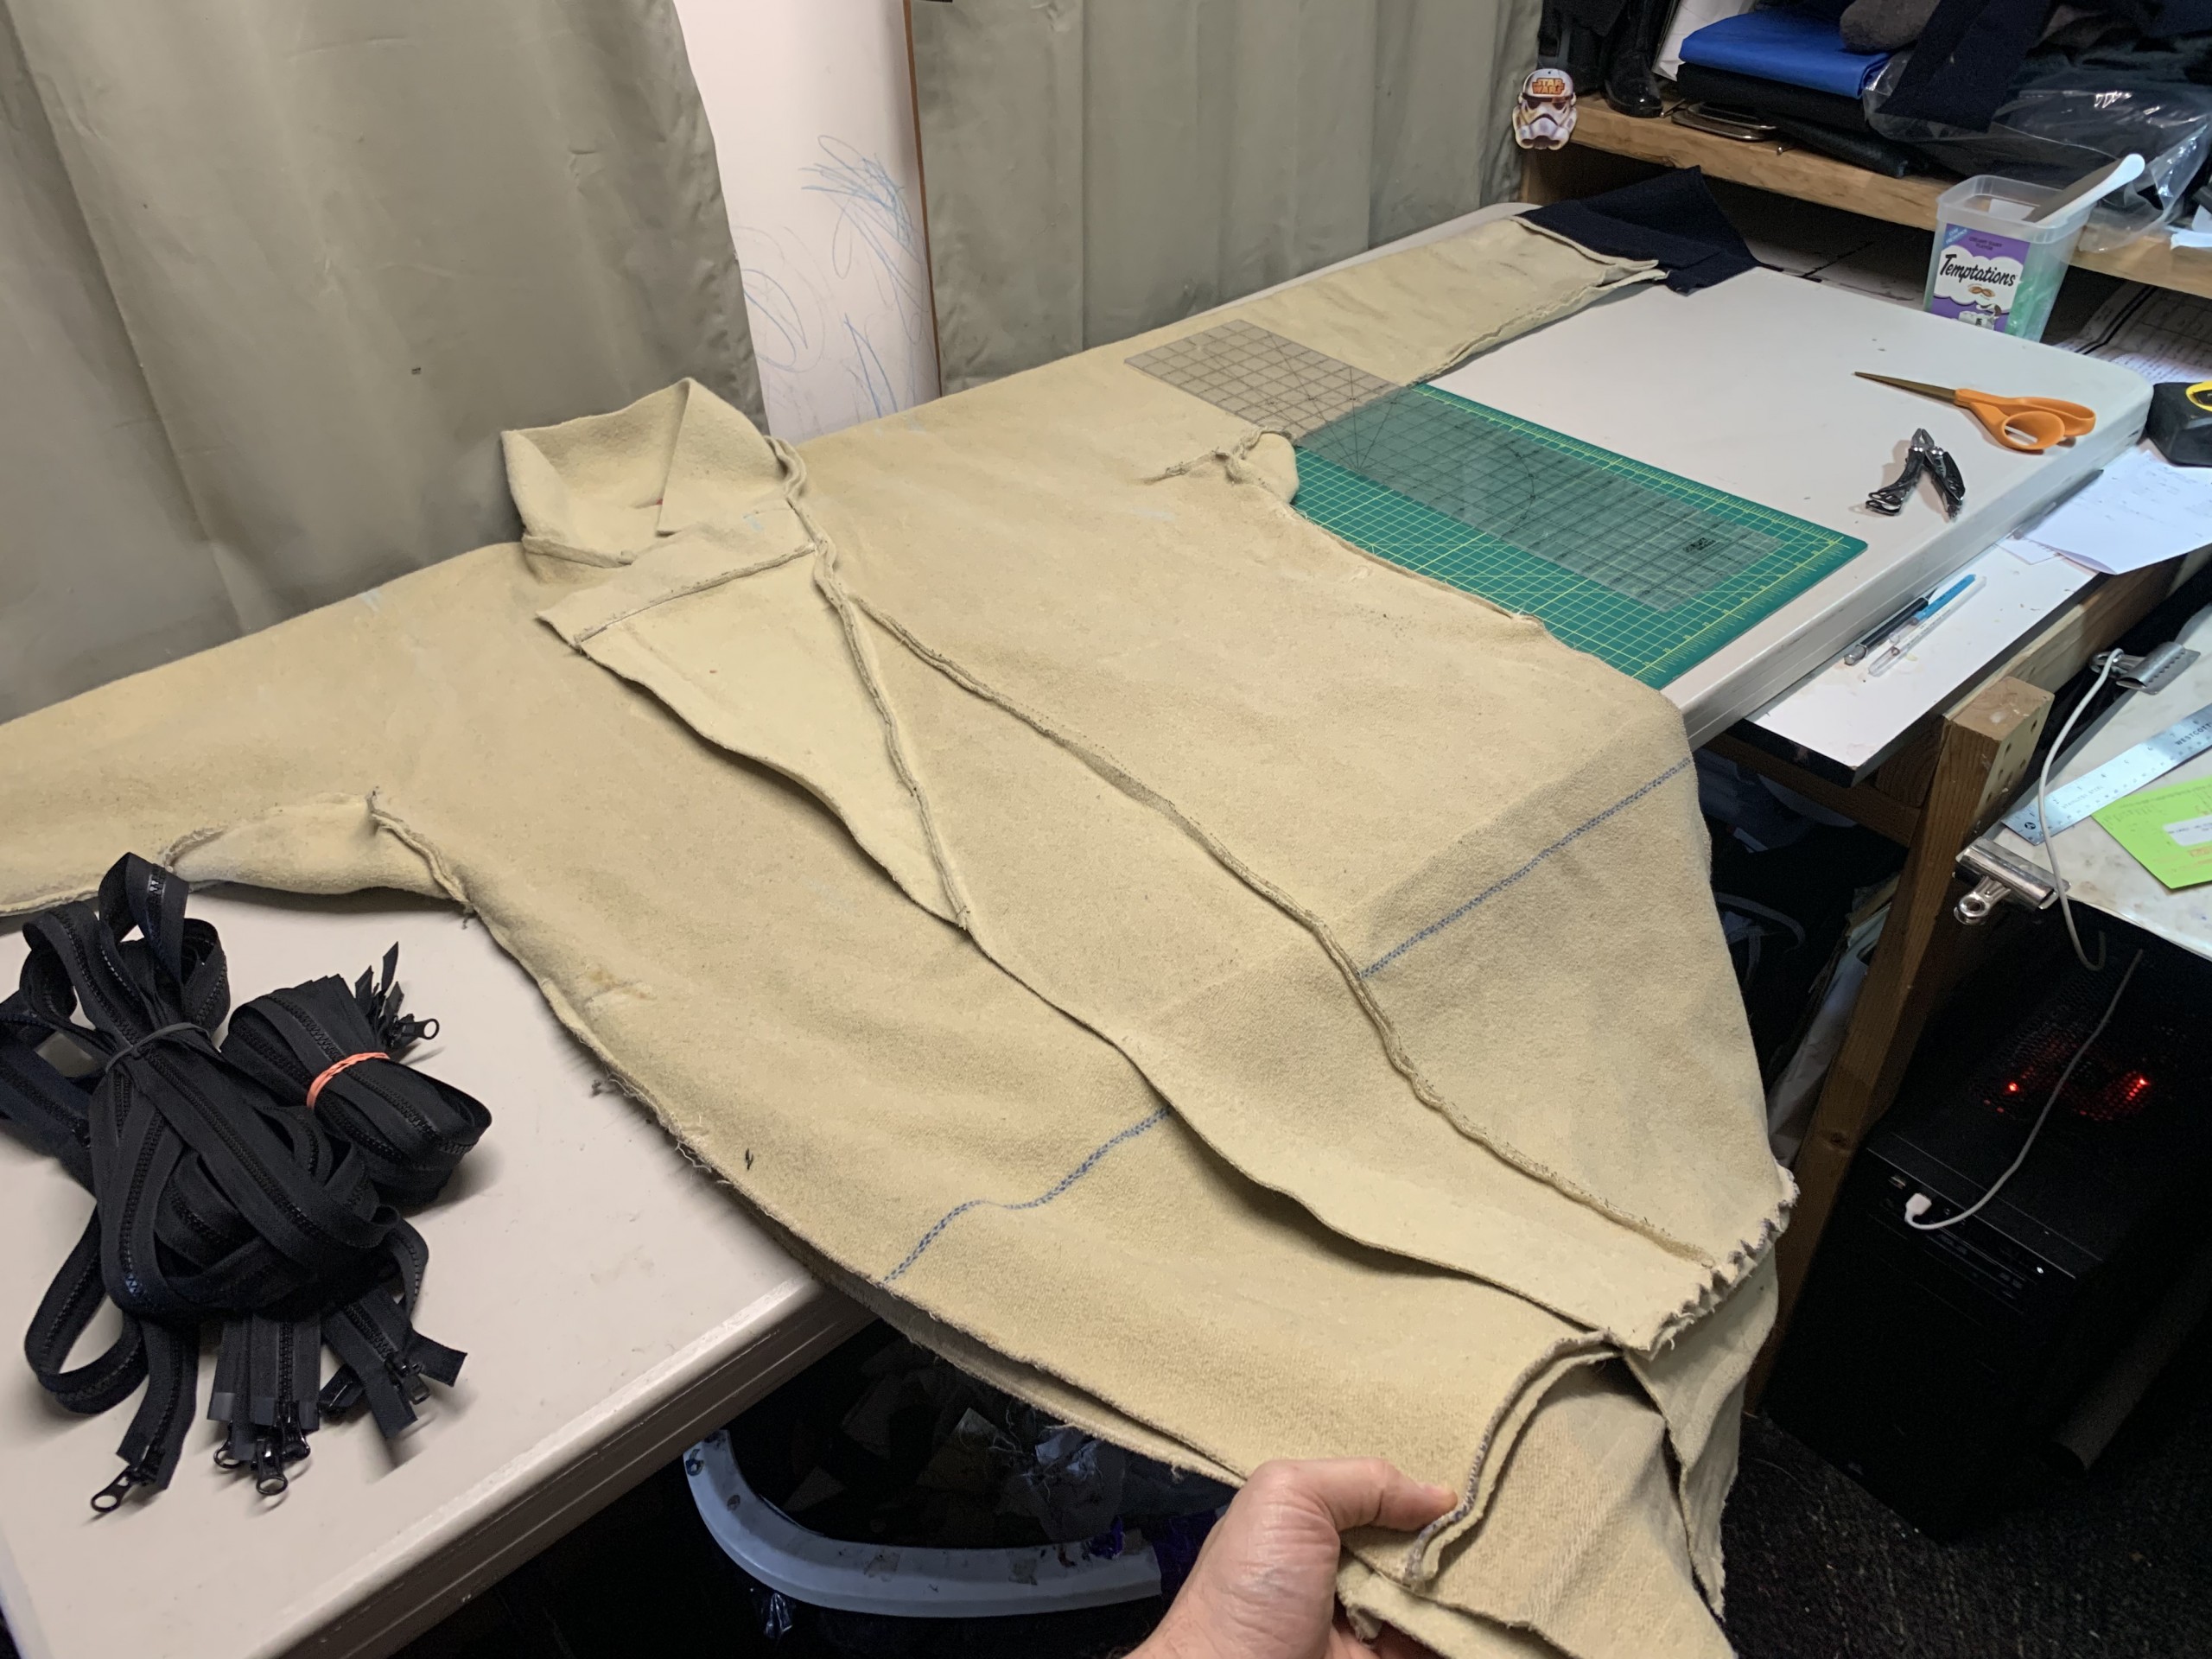
The coat starting to take shape.

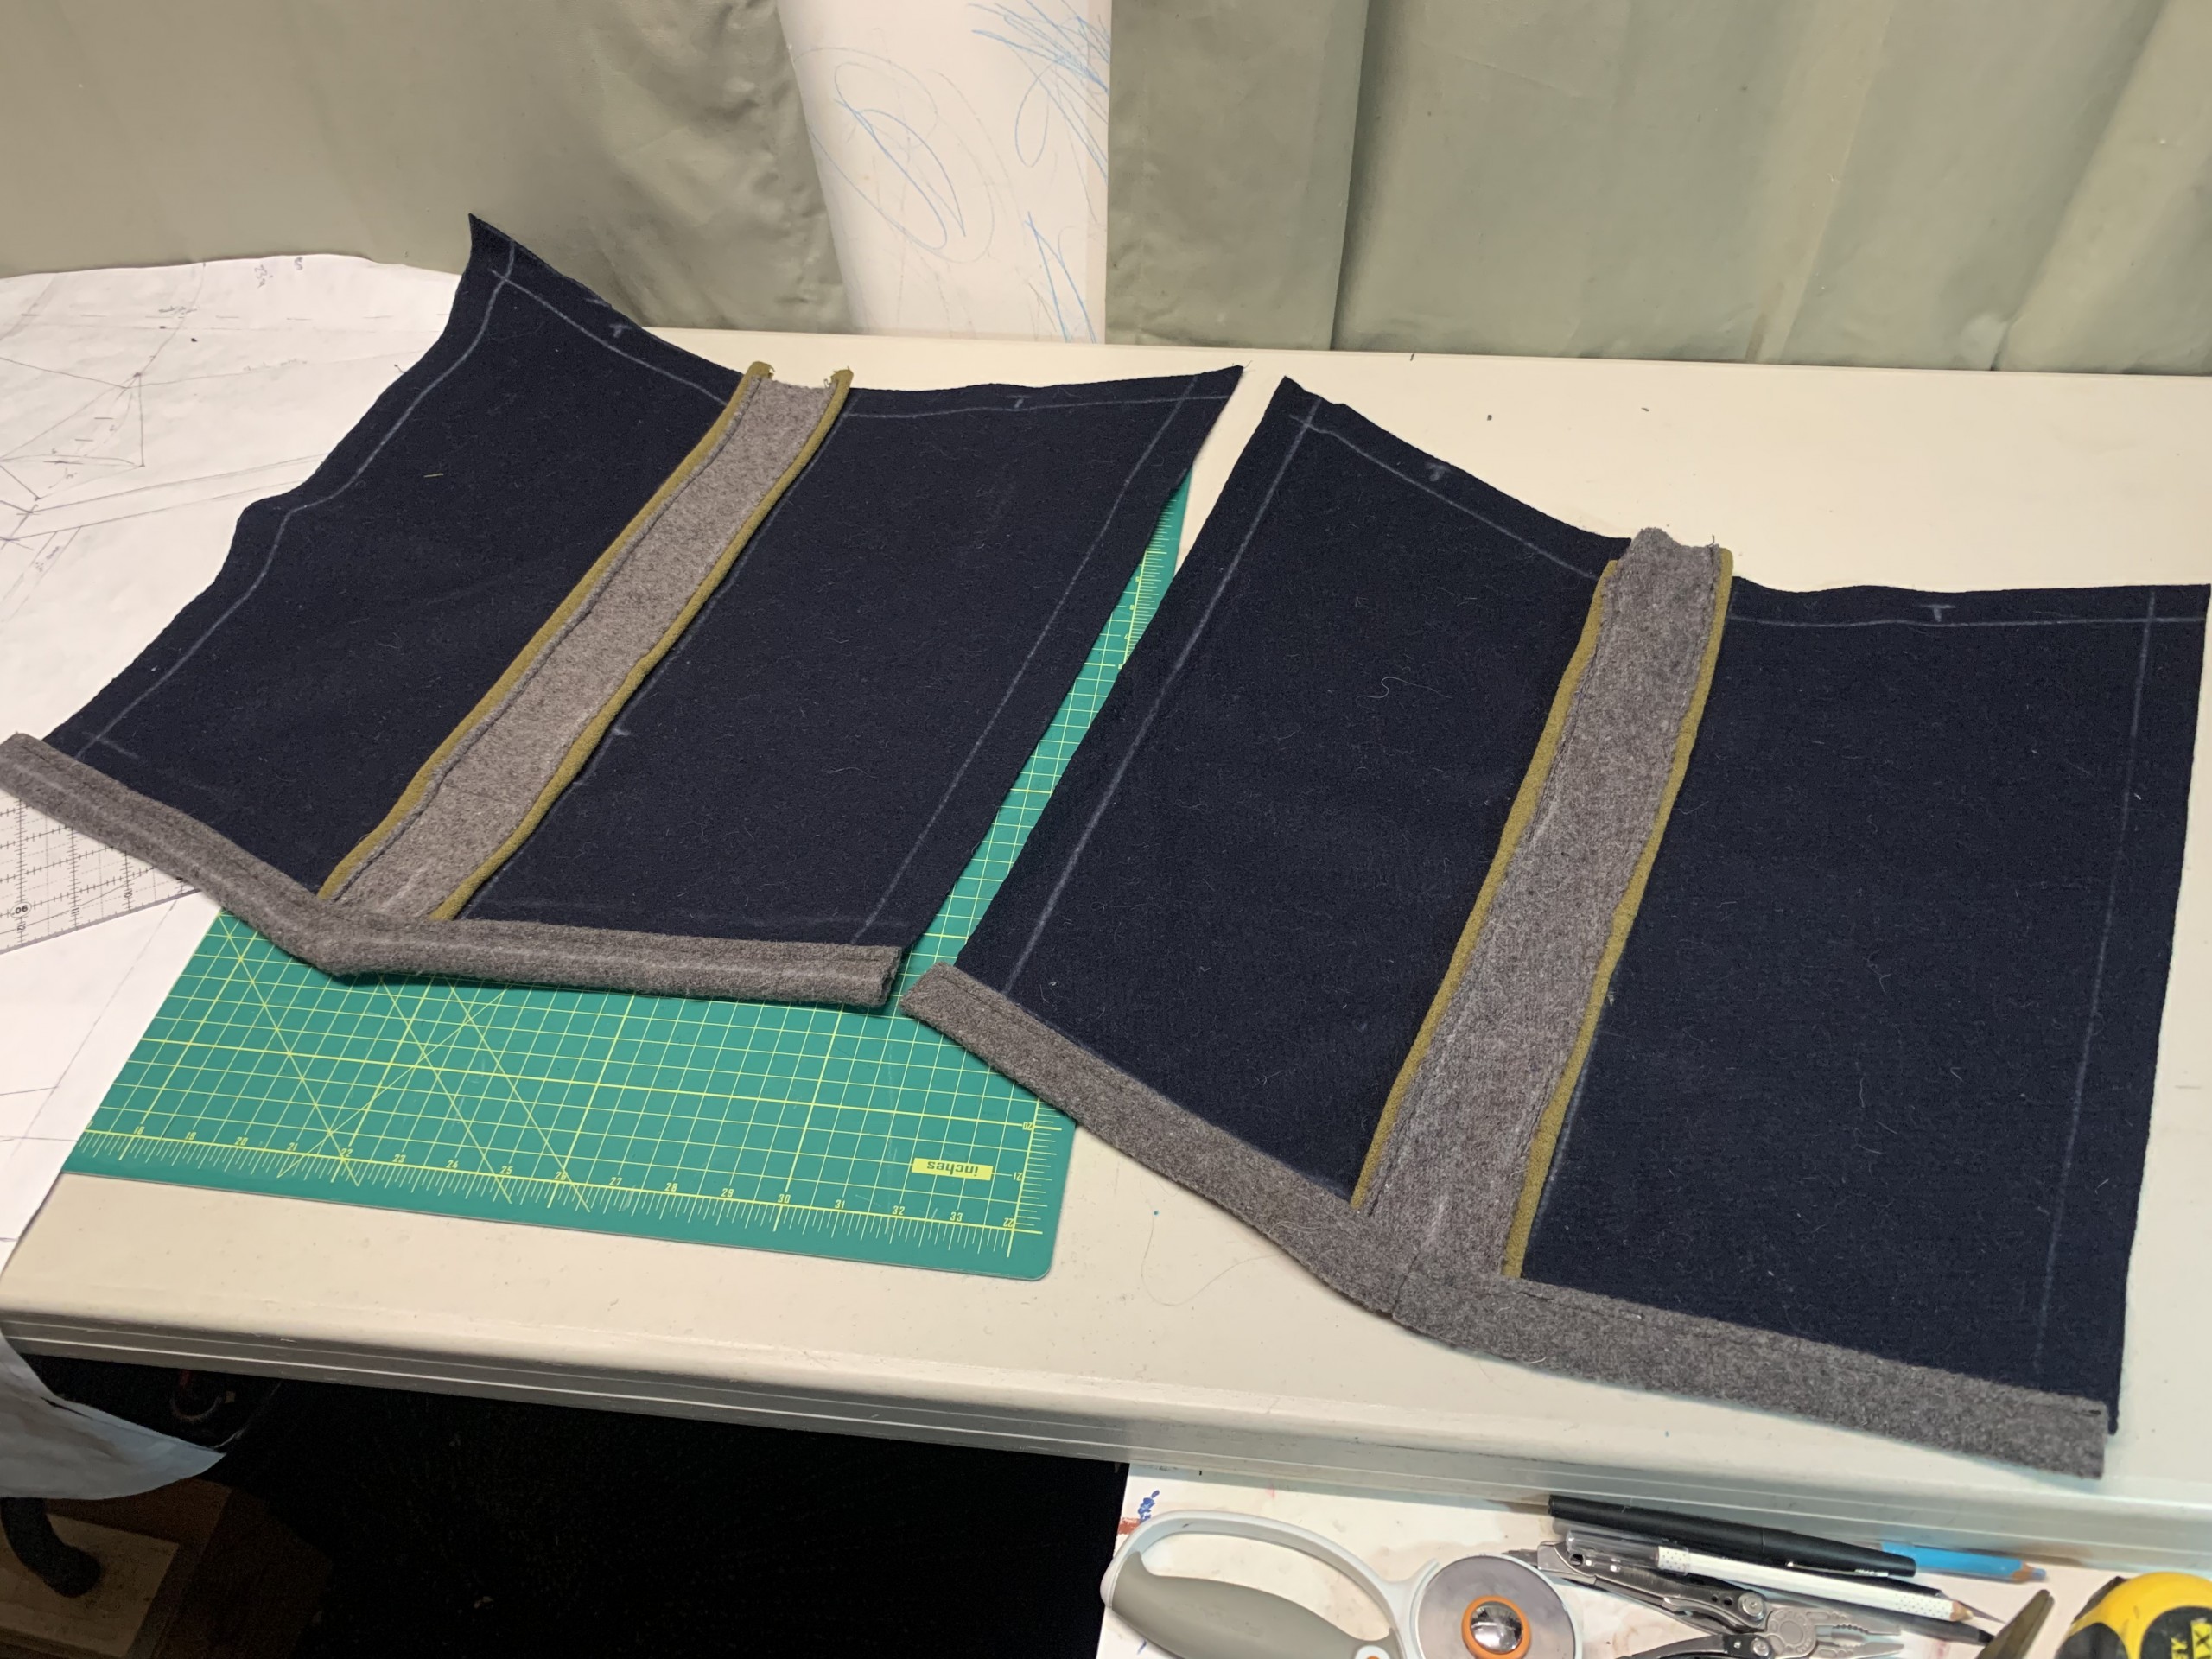
I made use of a lot of extra grey scraps of wool on the back of the coat. I wanted a design anyway, and the scraps I had directed that design process. The horizontal piece is actually a belt passthrough, though I haven’t used it yet.
The lower arm sections assembled and ready to attach to the rest of the sleeve.

The green stripes on the sleeve also weren’t part of the original plan, but I had some scraps of green and it allowed me to conserve some of the blue wool. It also visually ties well with the green yoke and “shoulder points”.
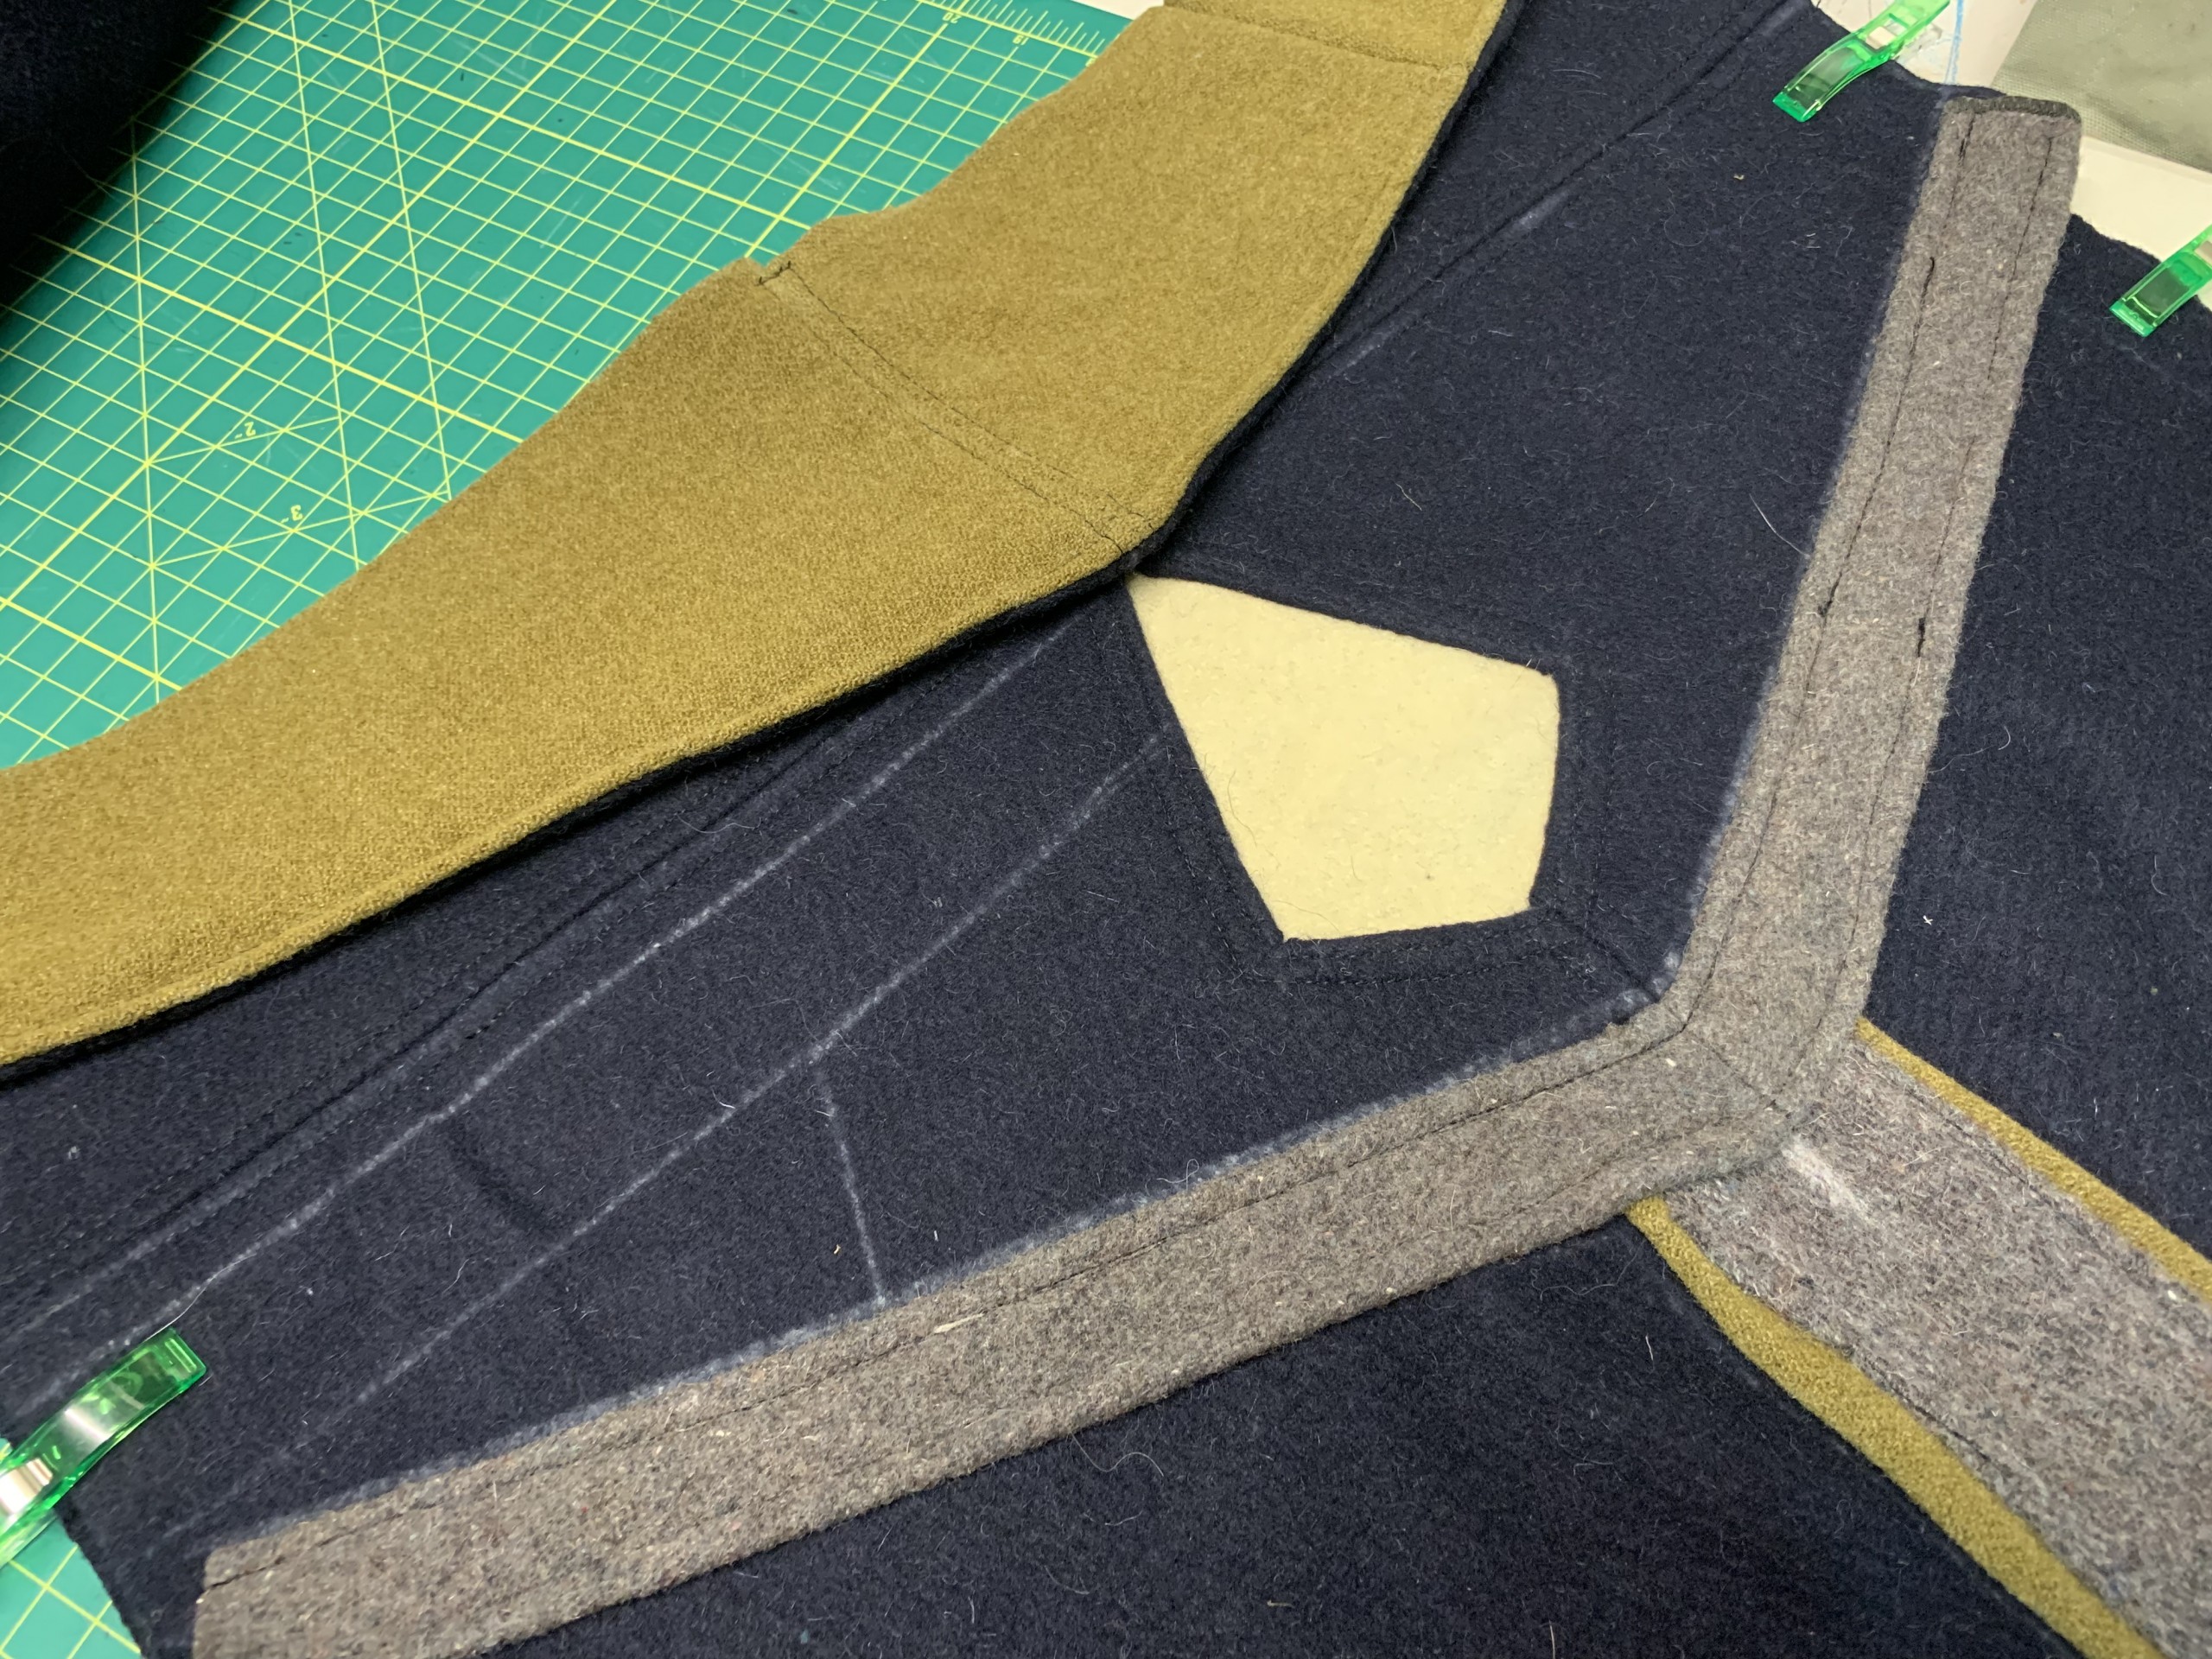
These white diamonds on the shoulders weren’t originally part of the design, but I was running low on large pieces of wool and wanted a way to distract from some of the seams. I also thought it tied together nicely with the white circle on the back. (The white lines are chalk marks that hadn’t rubbed away yet).
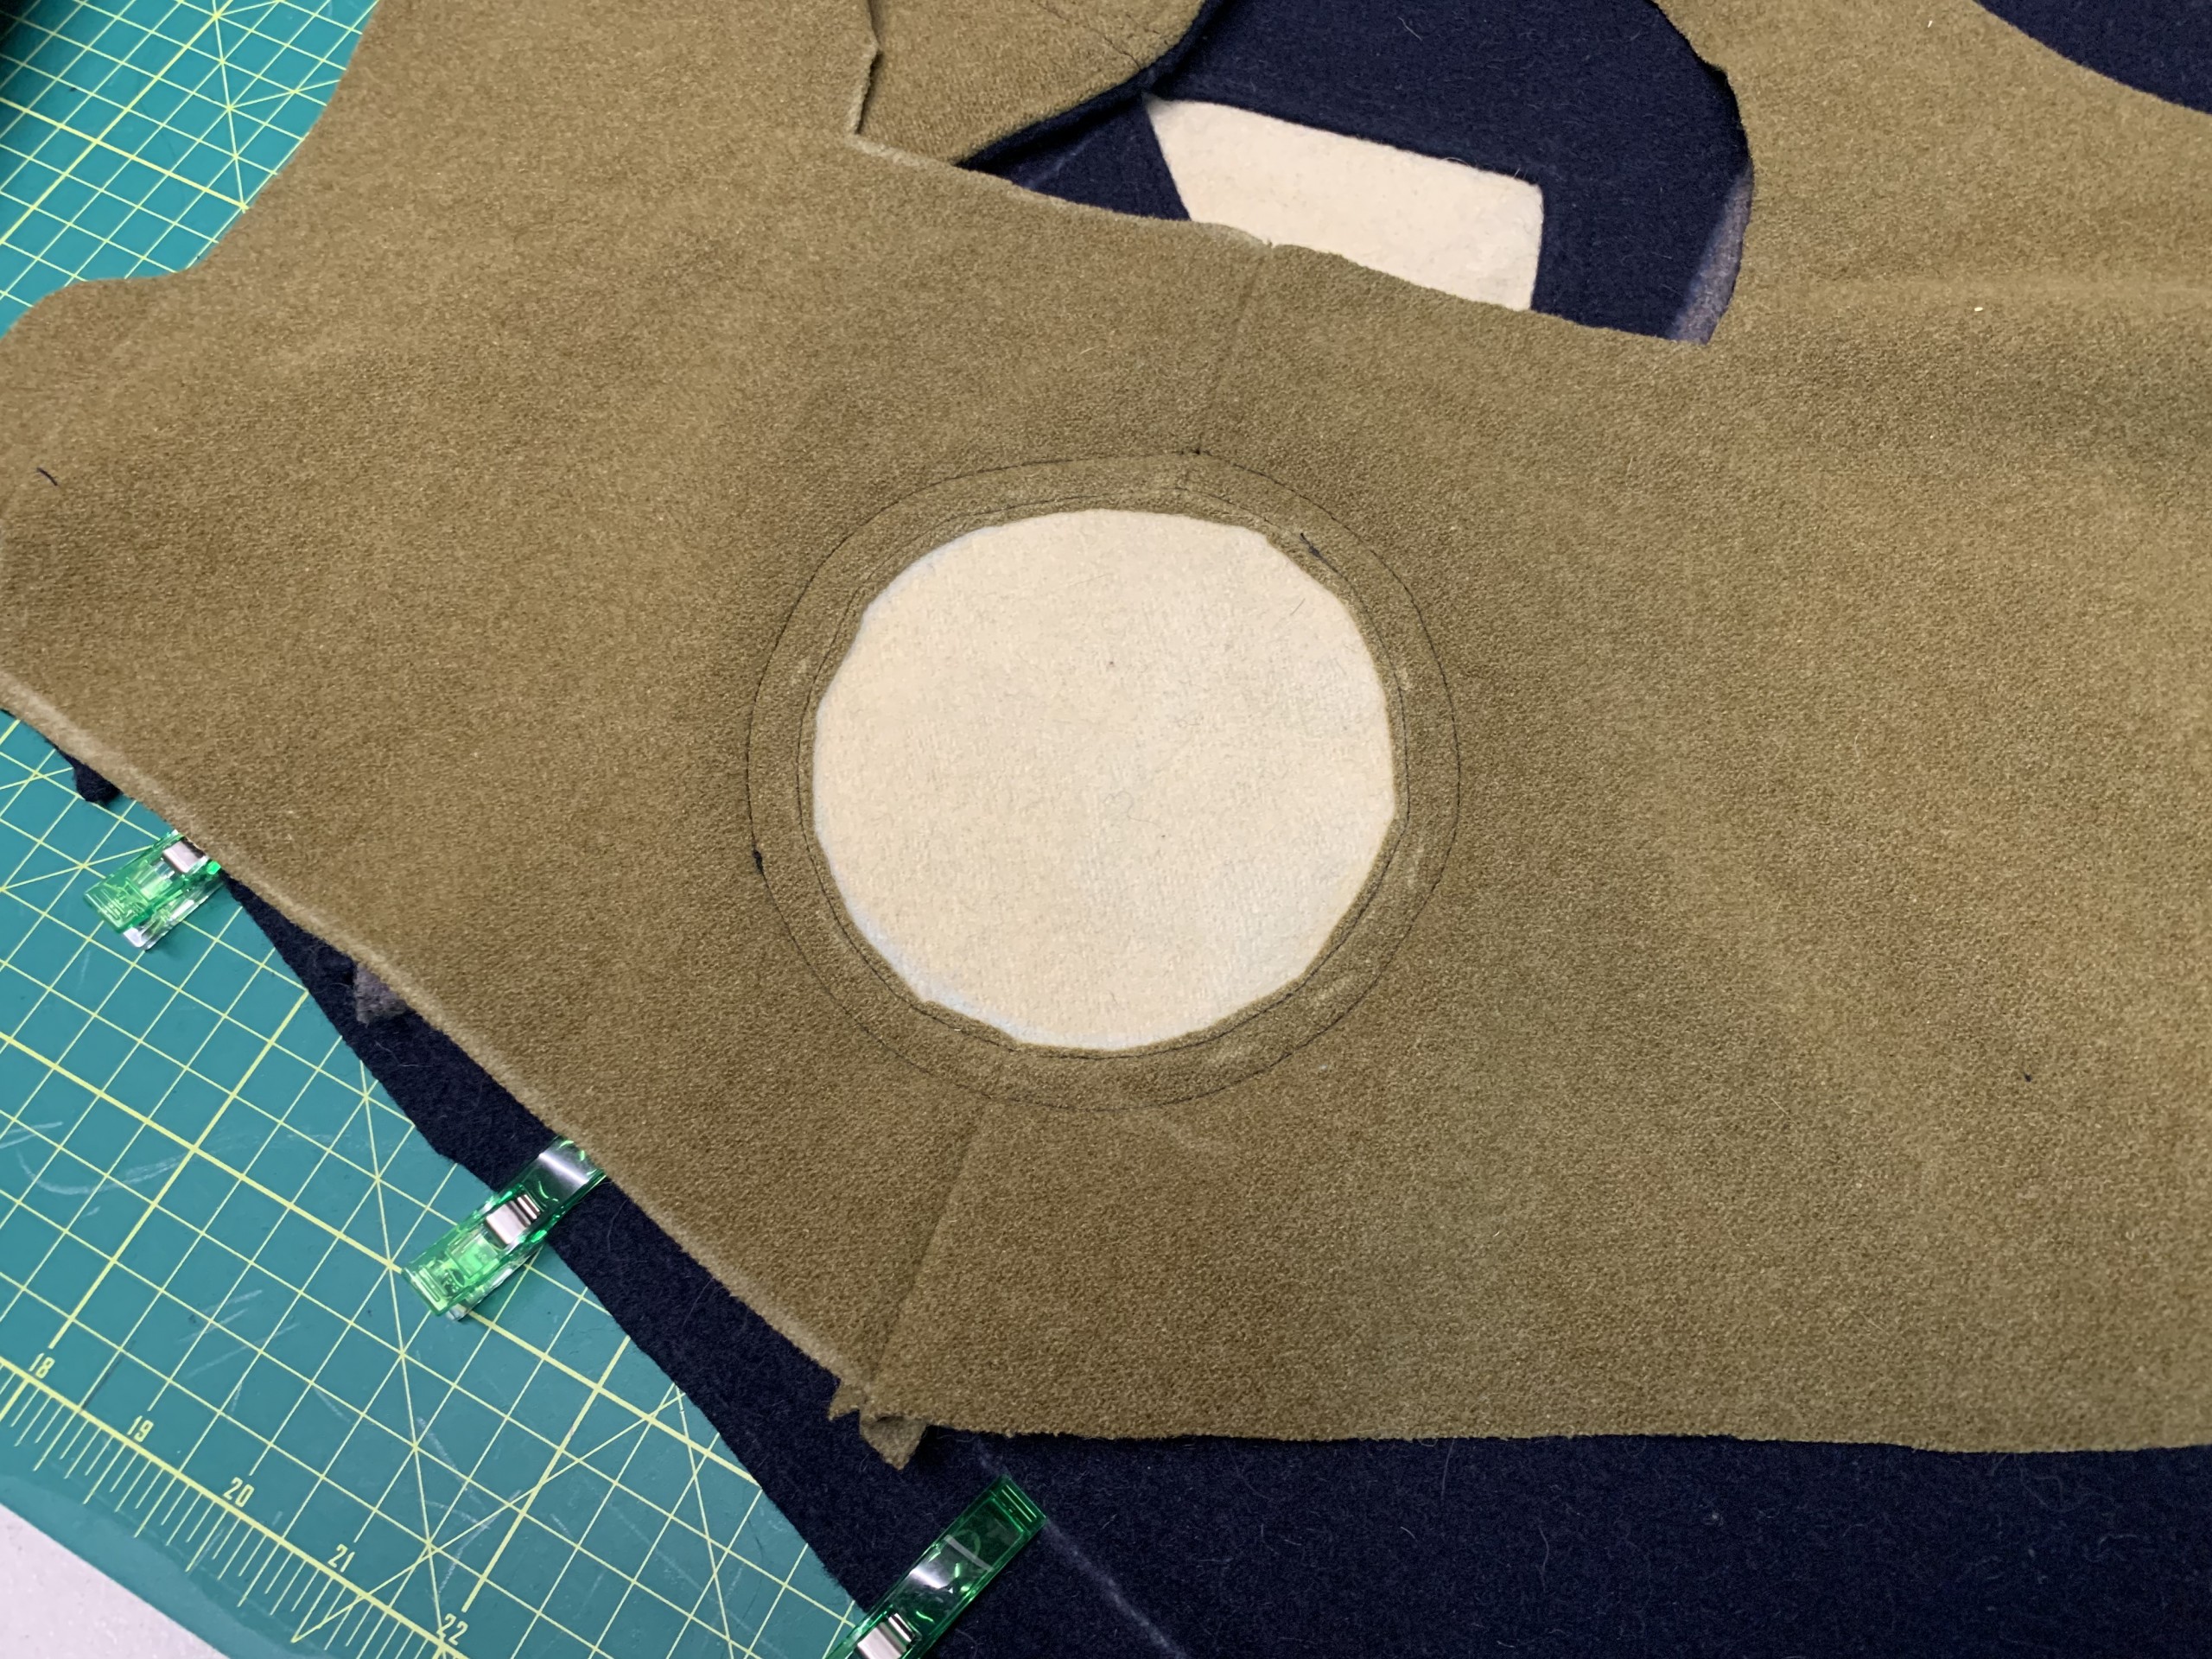
It’s not a perfect circle, but I’m pretty happy with how well this little detail turned out.
The coat taking shape, not many steps left, but a lot more hours due to the need to switch to hand sewing.

Attaching the yoke (the central green bit with the collar and white circle) was tricky. I originally hoped I could use the sewing machine, but by this point the layers were too thick in spots for the needle to plunge all the way down and connect to the bobbin, and the whole coat was really heavy and unwieldy. My fingers are going to be sore for a while from all the hand sewing (which I did get a little better at eventually).
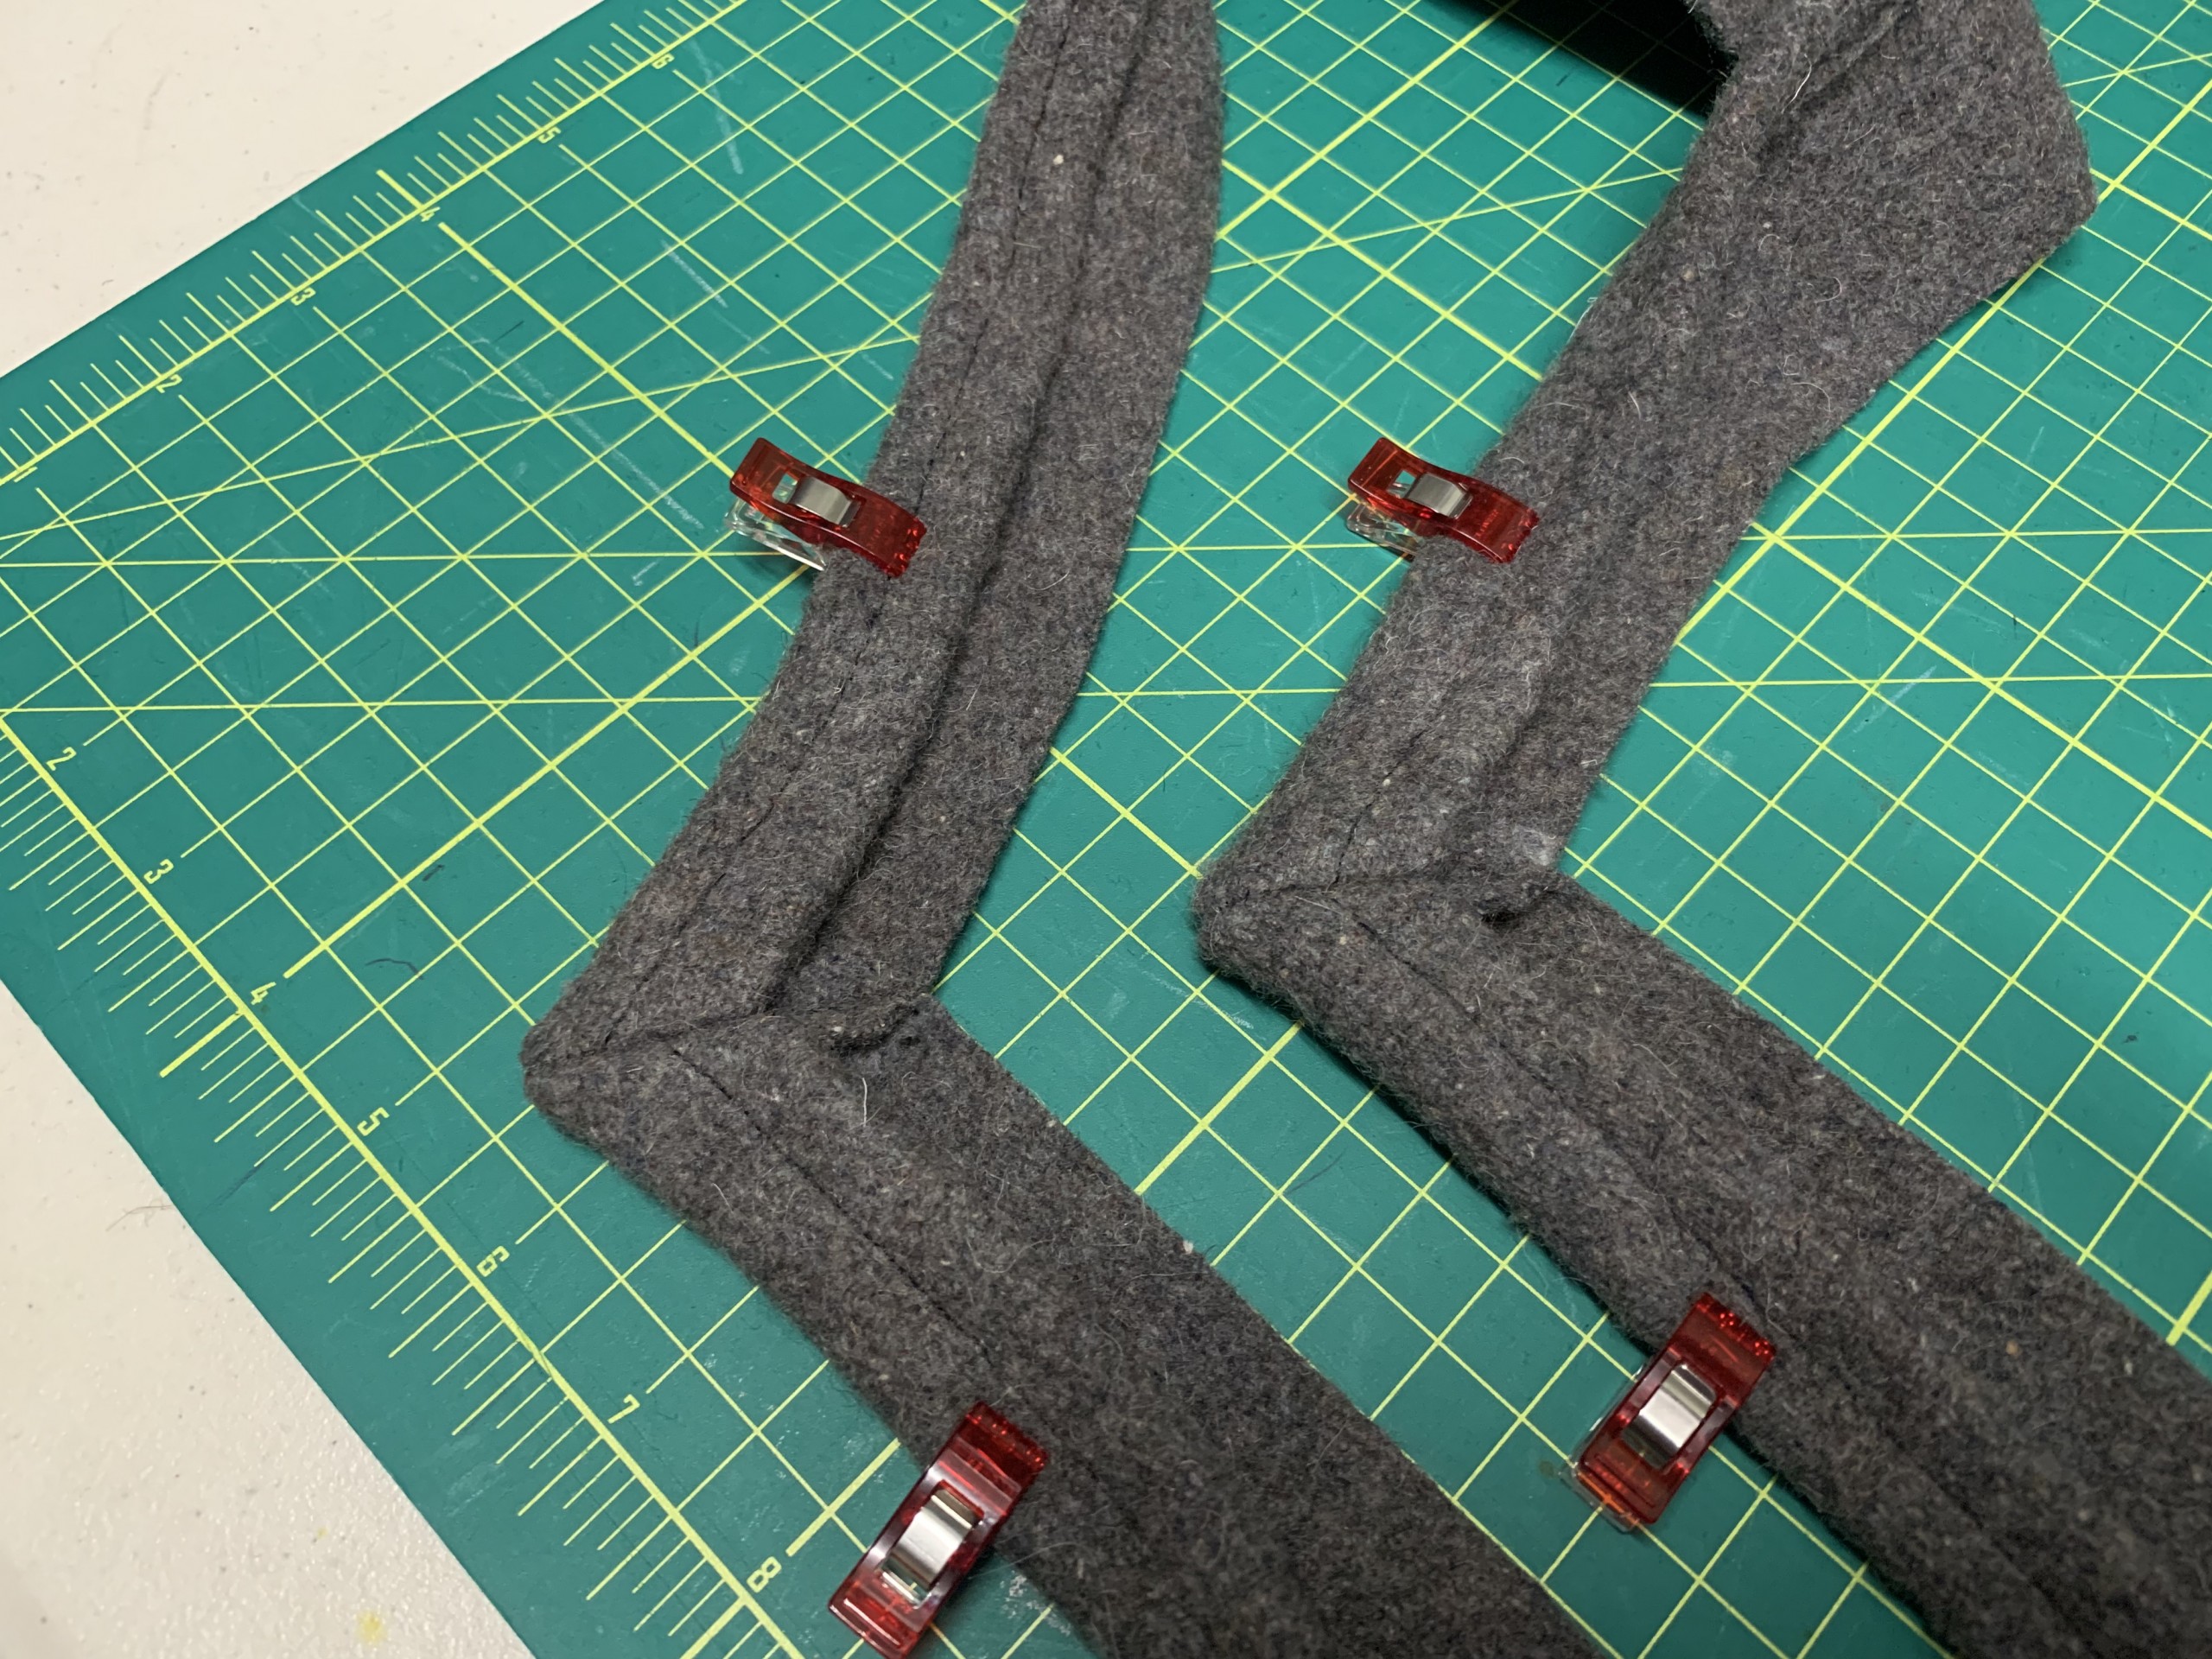
I finally figured out how to do some proper mitered corners on my trim. Switching from inside to outside corners was a bit tricky to wrap my head around, especially when trying to get the length of the pieces right.
I’ve worn the finished coat for a few days now, including taking it snowboarding. I still need to go on a cold weather hike (might happen Thursday night) and wear it winter camping to round out the field testing, but I’m pretty happy with it overall.

“Field testing” the new coat snowboarding.
Now that The Beast Coat (I have been swapping between calling it the Gi Coat 2.0 and this, because it is quite the beastly assemblage of wool. It comes in at right around 14 pounds!), I need to turn my attention to some other projects. I have a couple of illustrated book ideas, working on It’s Plunger Monkey Dynamo Time!, concept art for Revery, shirt designs, and more (like a website overhaul…I think it might need a face-lift and some restructuring). But first, I’m going to get Inside Toby’s Brain done. I’m also due to throw together my traditional “year in review” post, too, preferably before it’s next year…
Please let me know what you think, it makes my brain happy.