Um, no, that’s not yet another new logo…it’s been there this whole time…why?
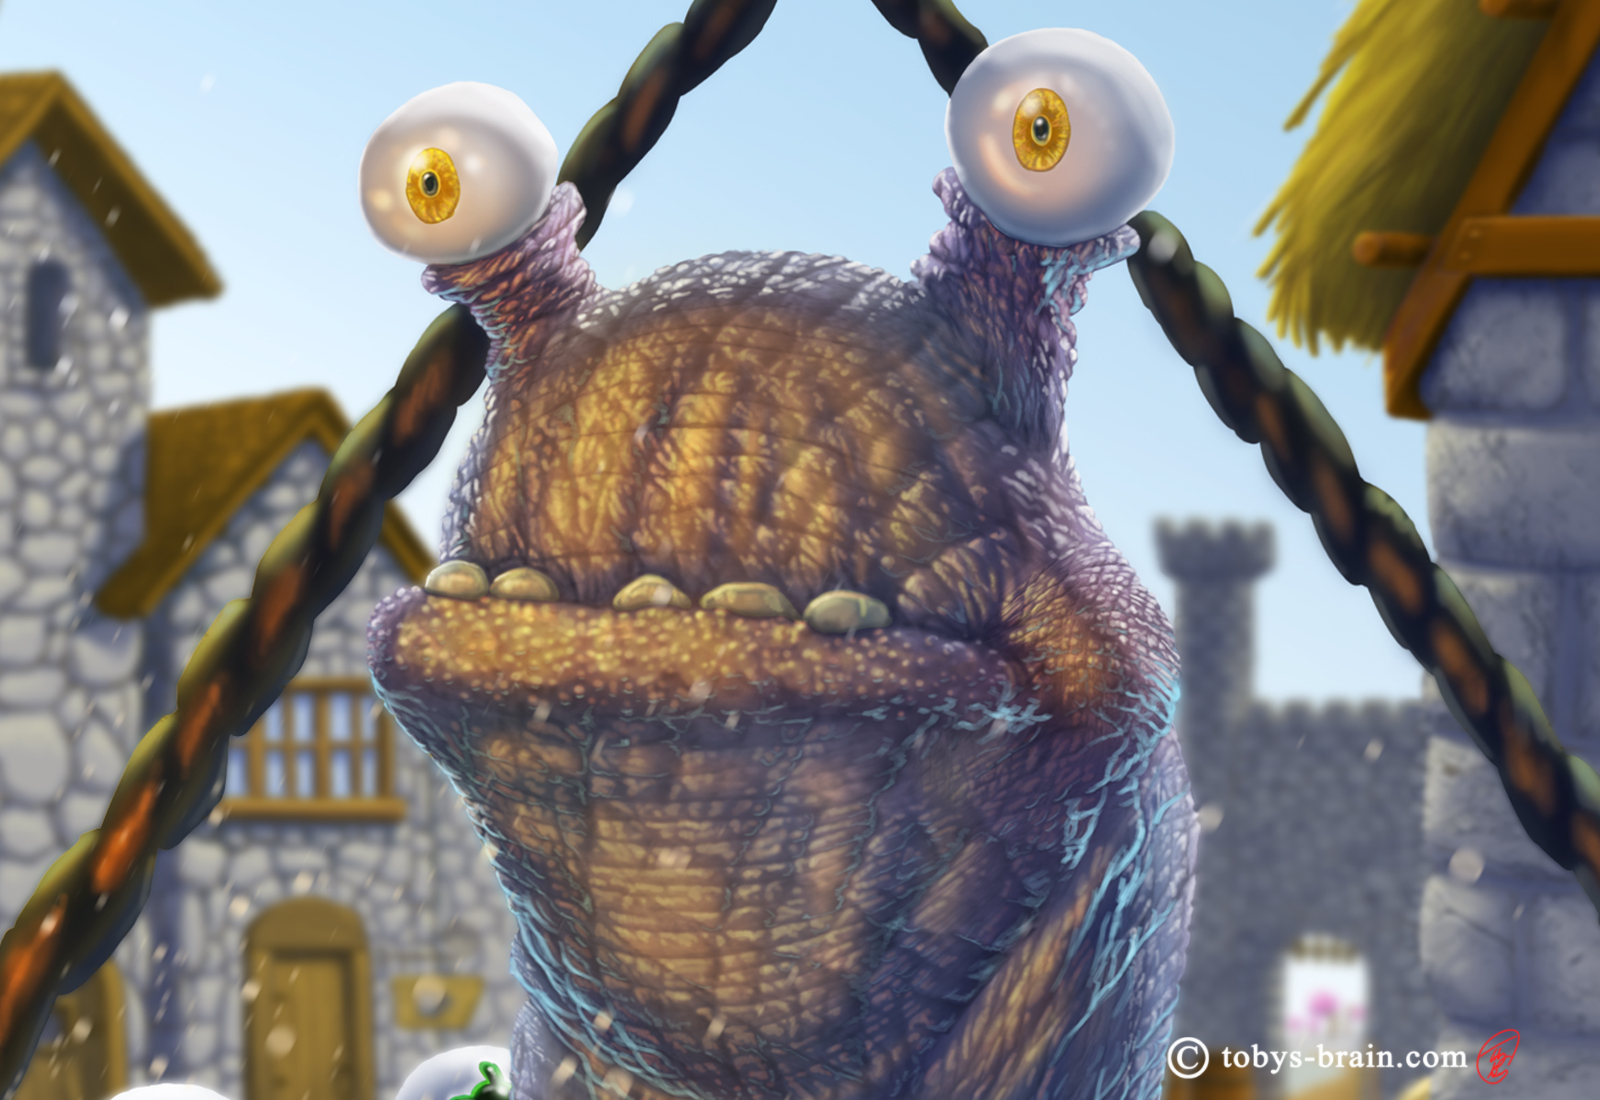
Anywhat, I managed to get some solid hours in the studio the last few days and “finished” the Willy McEyeballs piece. I say “finished” because I’m never really done with any of the art I make. I always see problems, things I meant to fix and forgot, things I want to improve and tighten up. But, I think I need to move on from this one. For now.
Let’s take a quick look back at where this piece started. I was going to show some more transitional stages, but I ended up using a gazillion layers and it just became a headache to figure out which ones to switch off or leave on to get back to earlier stages (the layer processes doesn’t always go in order, depending on what is being changed, blend modes, etc). Maybe next time I’ll remember to save snap shots at the end of the day or something to better capture the process.
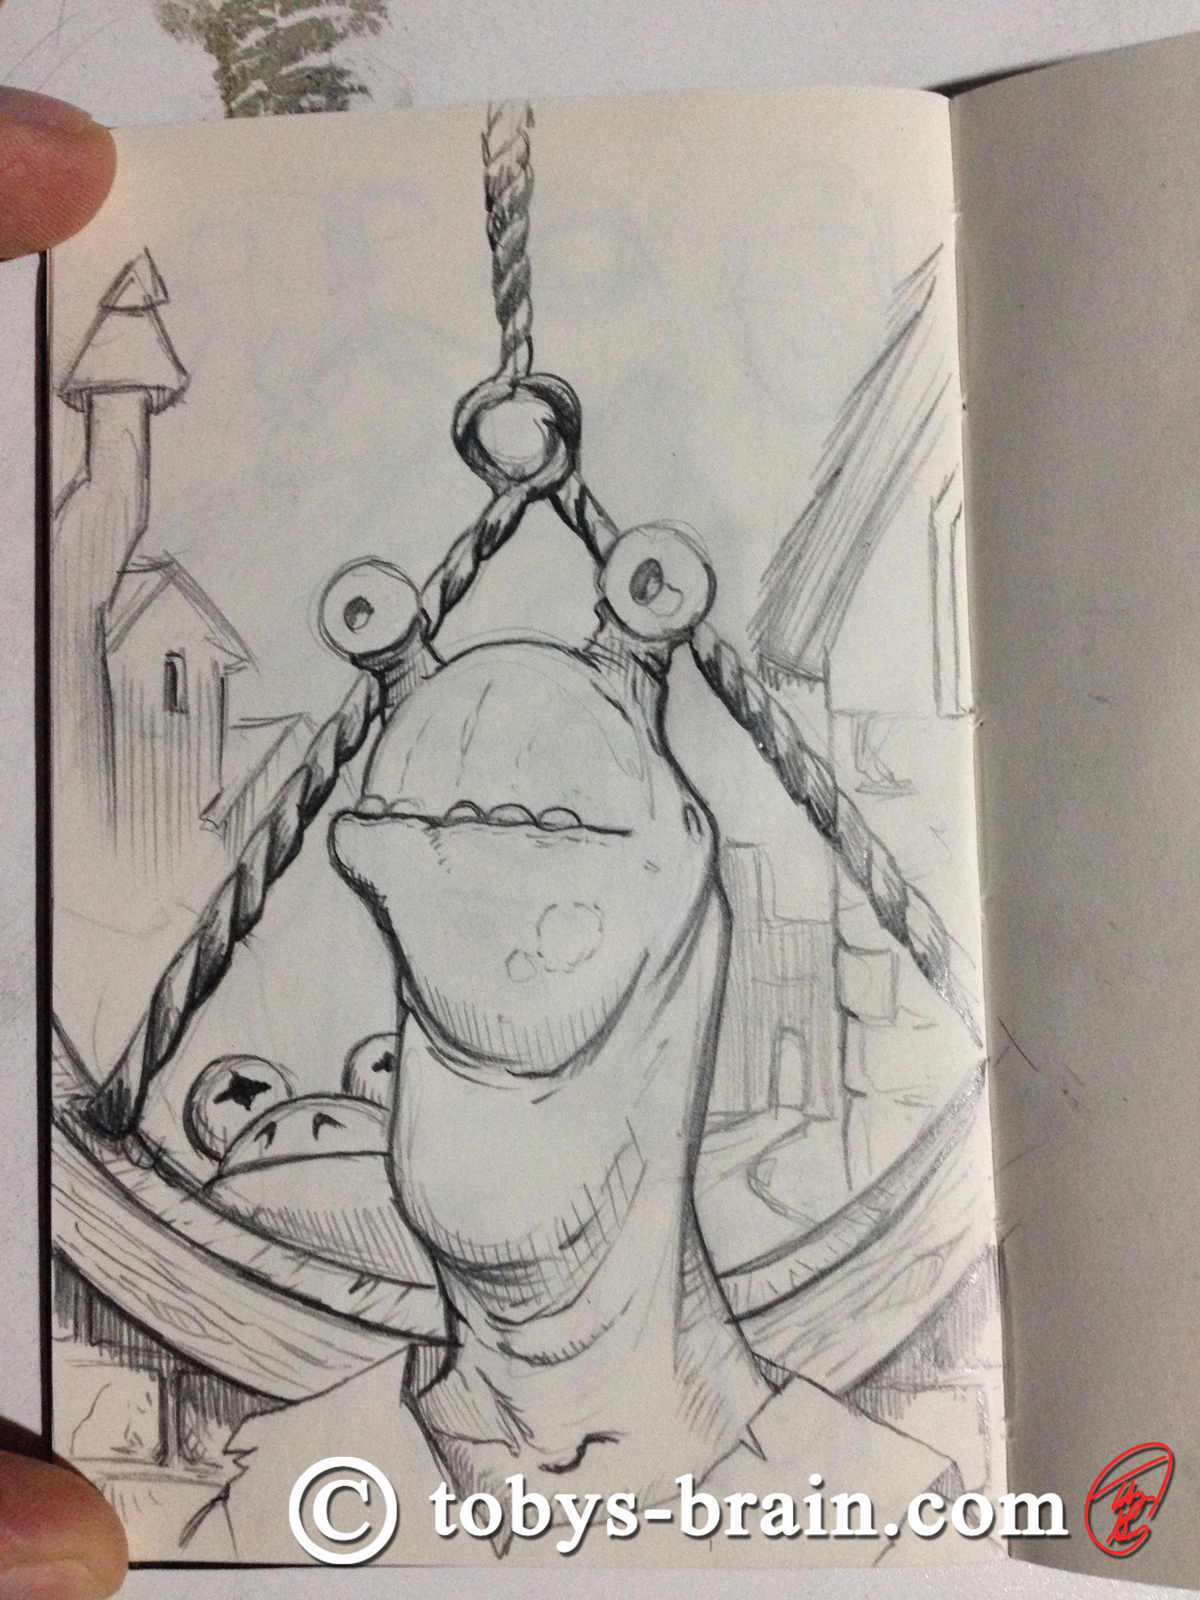
Willy started as this random sketch in my moleskin sketchbook a few months back. My brain has since told me that he and Sherman live in the world of Revery. As to what they’re rolls are, I’m sure my brain will let me know when I need to know. It’s good like that.
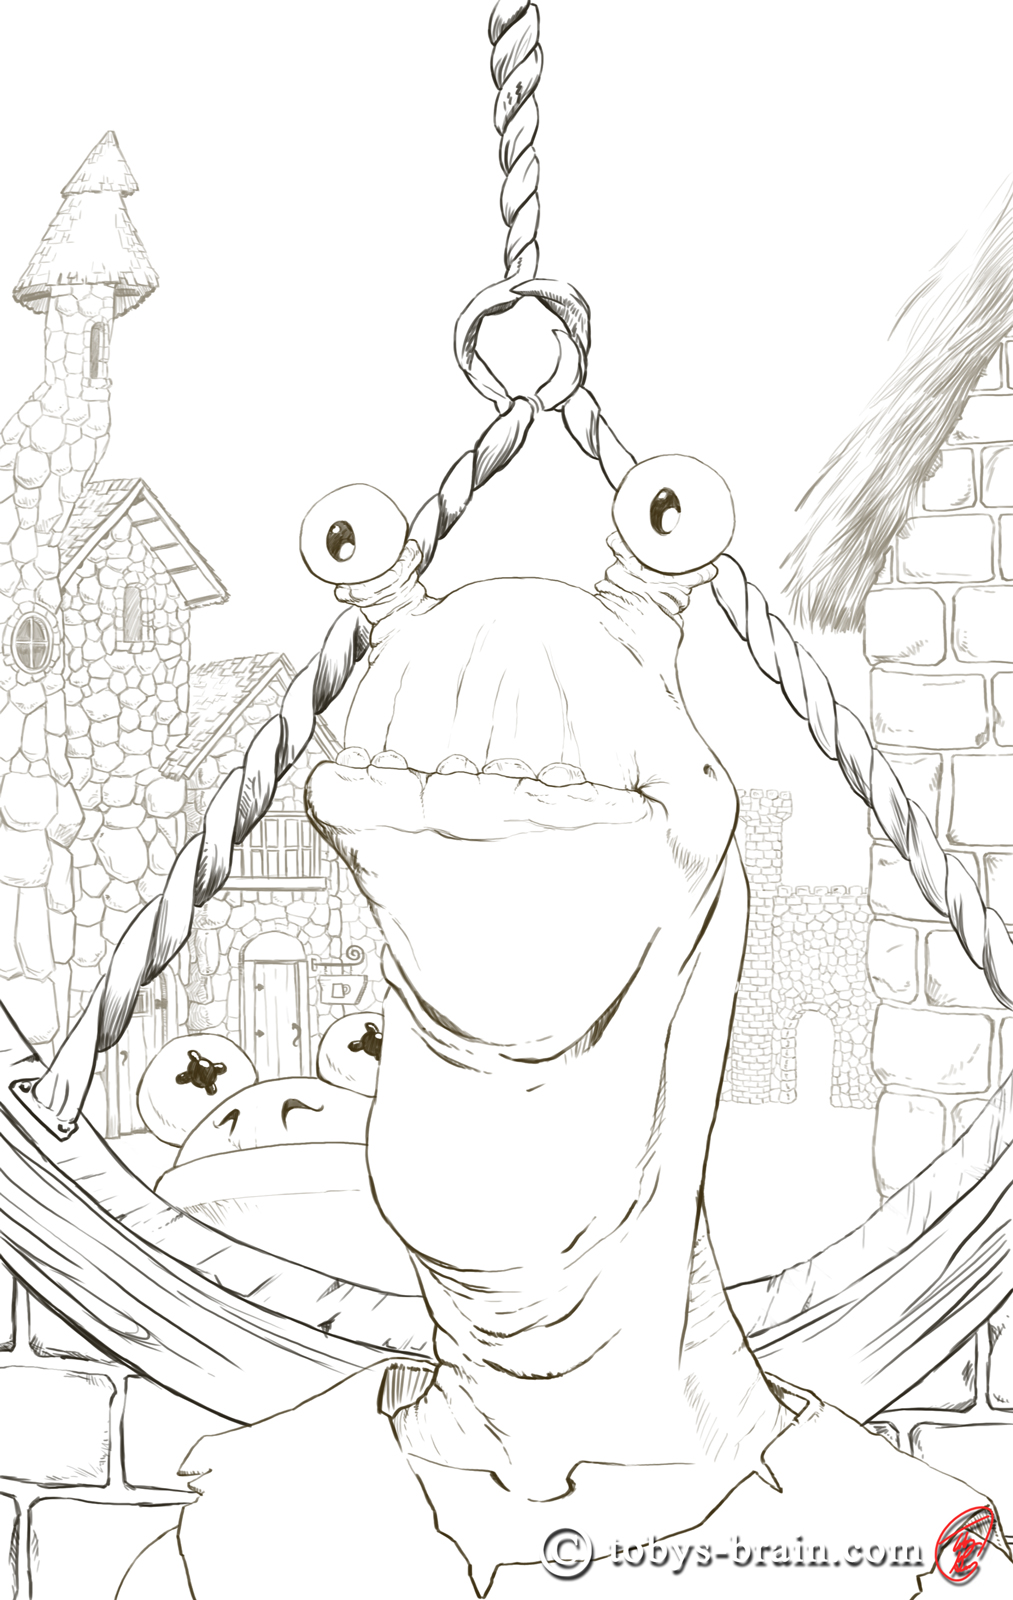
I initially tried painting on/under that original sketch, but it quickly became evident I needed to tighten up my line work before continuing. So I did.
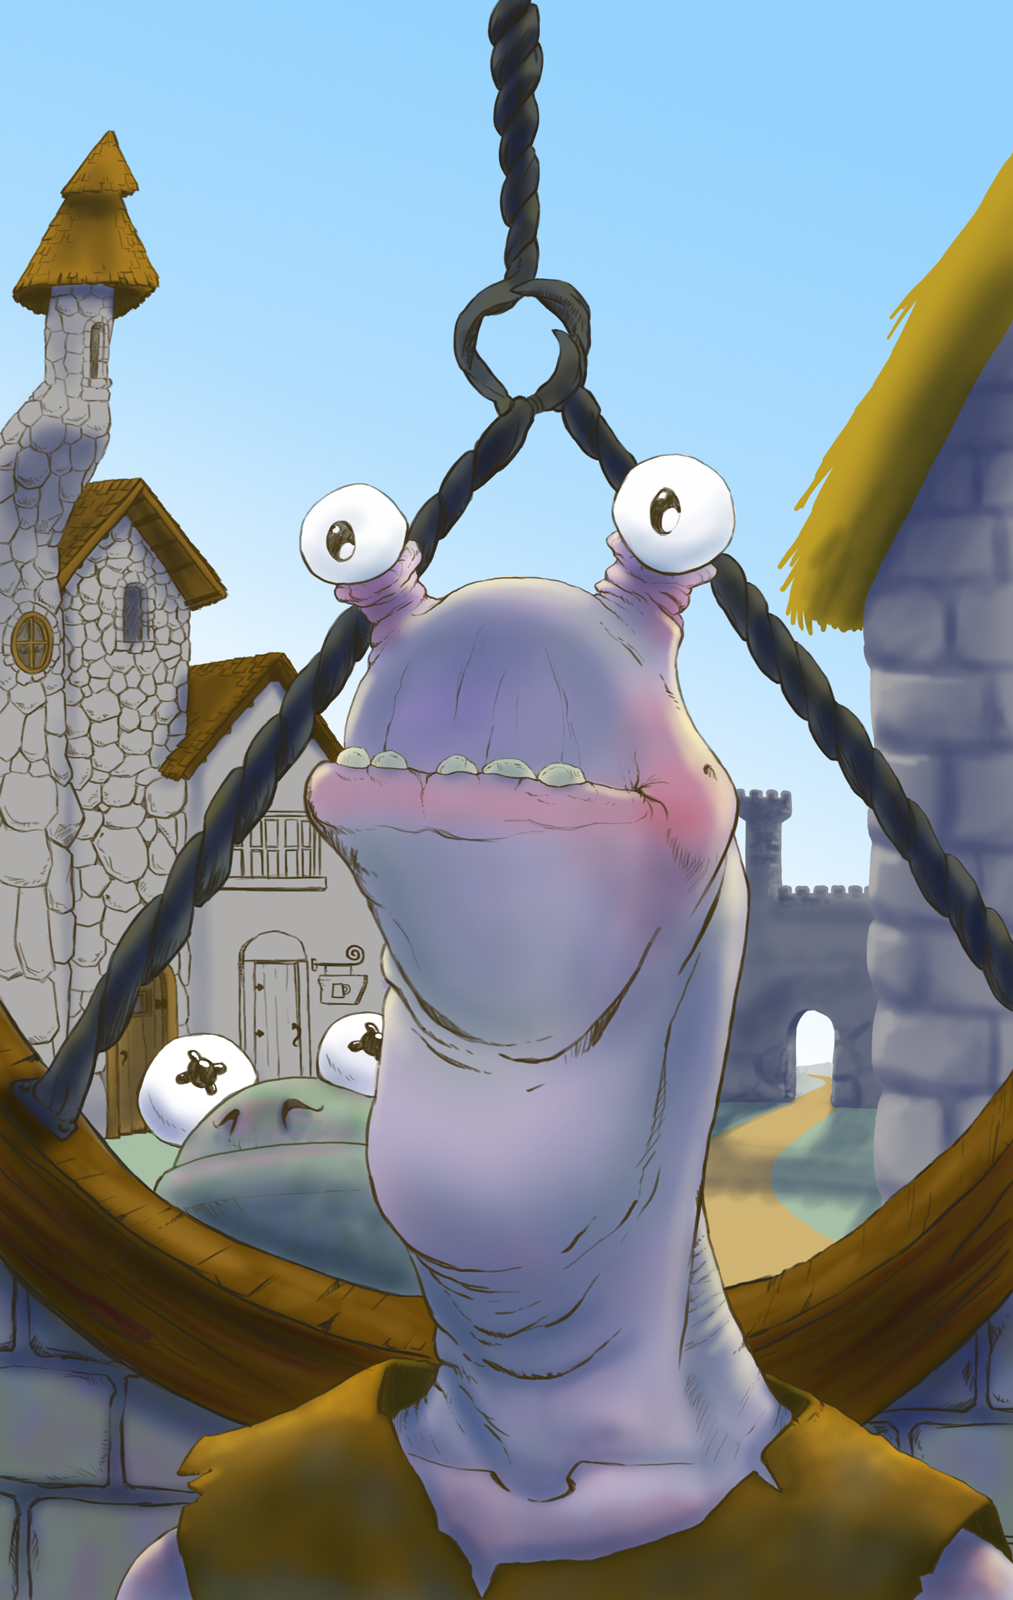
I began laying on some solid slabs of local color and added multiply and overlay layers to get some basic shadows and highlights.
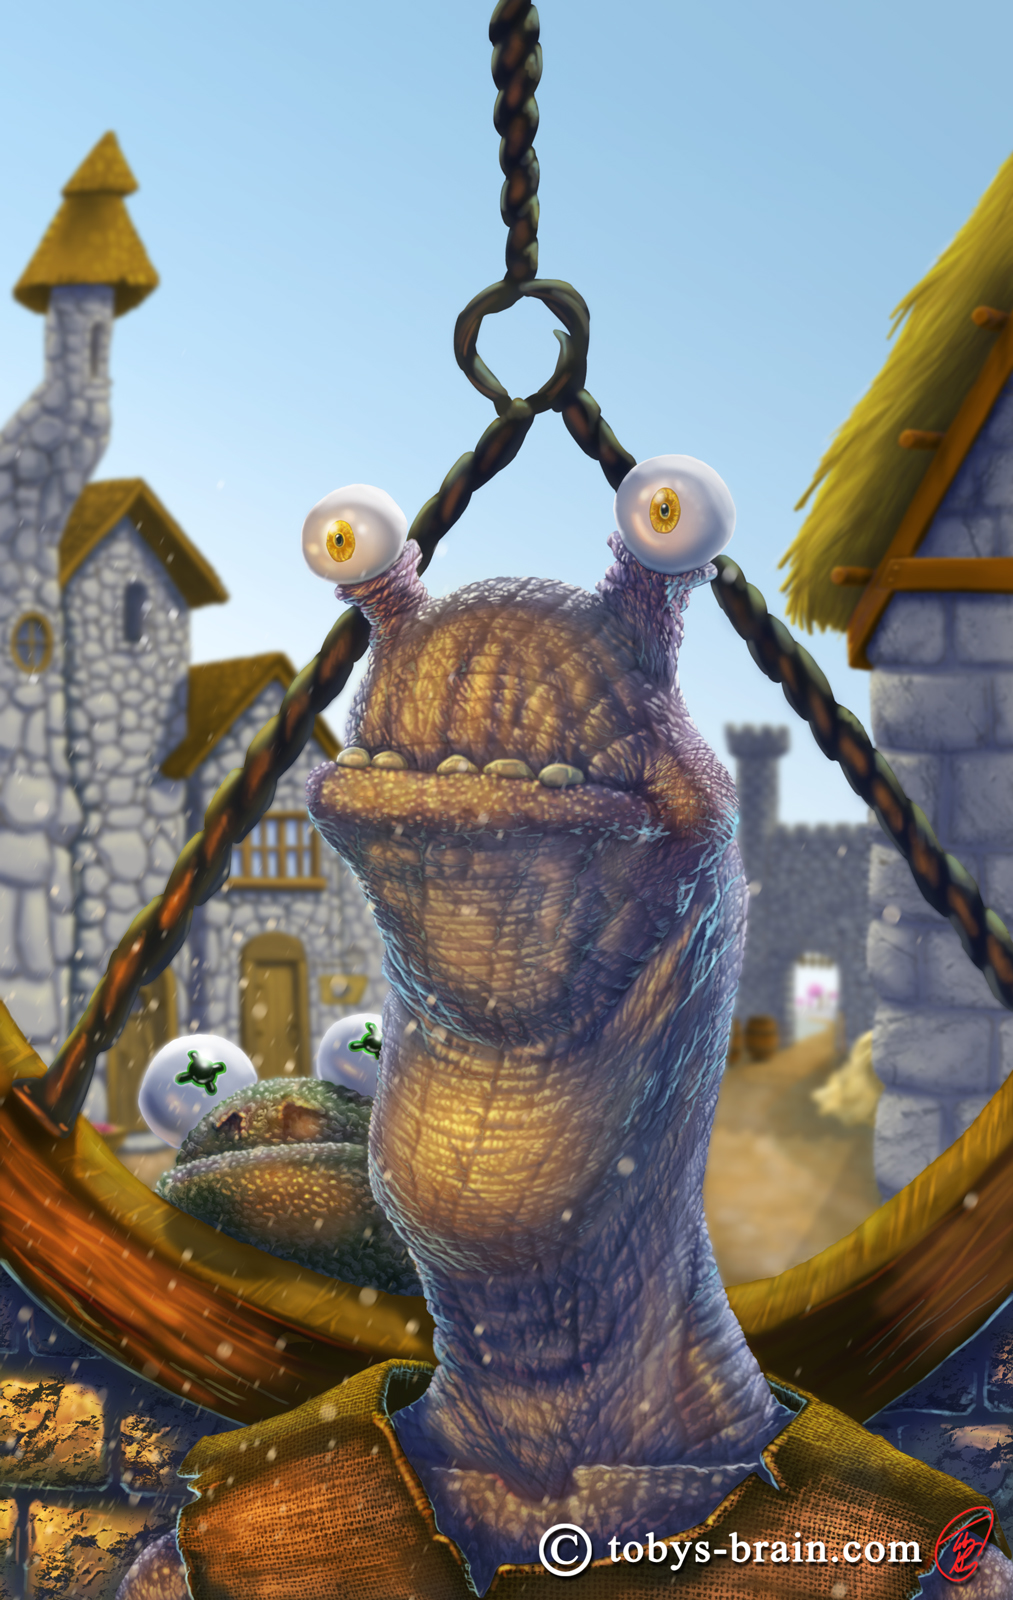
Just a few additional keystrokes and mouse clicks and filters and voila…
This is probably a topic unto itself that I’ll tackle at some point, but if anyone thinks making digital art isn’t “real” art, they probably have never tried doing it. Yes, you have to learn a different interface. I’ve never really worked in oil paint before, so I’d have to learn how to use those tools before I produced anything worth looking at, too. Yes, you can “cheat” in Photoshop, but if you call using Photoshop tools cheating, then you probably ought reexamine some tried and true traditional art making techniques like print making, sponges, different size and shaped brushes, adding plastic wrap or salt to water colors, light boxes, tracing paper, transfer papers, photo copiers…need I continue? Art making is full of innovative, inventive ways of getting what’s in our heads out for the world to see. Computers are just another tool in the art box, and like all the others, they have pros and cons. At the end of the day, it’s not about what tools you used, but how close the end result is to what lives in your brain.
I’ll stop there before I get really ranty. Suffice it to say, my prejudices about digital art are drastically different now that I’m learning how to use the tools.
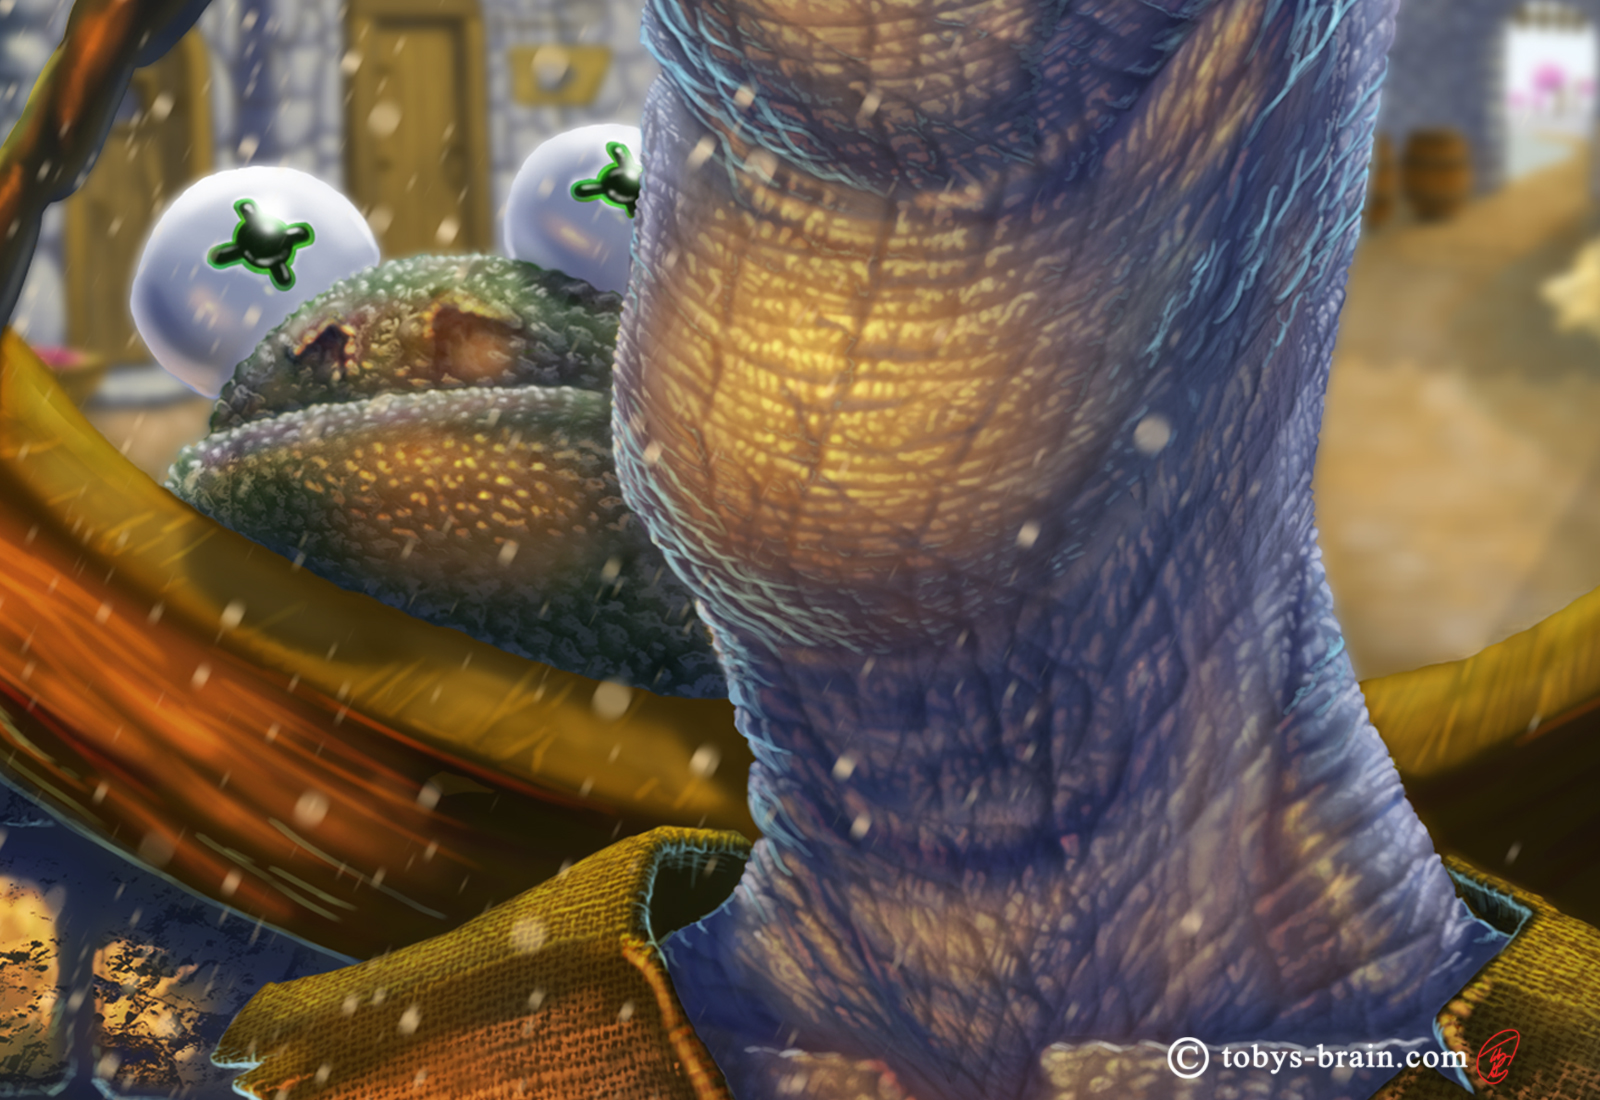
Anysquids, I spend a lot of time working on textures with this image. The way I generally use textures at this point is the way I learned from watching Aaron Blaise tutorials. I create a brush from a picture (which can be a process unto itself) then I use it like a stamp. Once I have a flat stamp on my image, I use Photoshop’s powerful transform tools to warp that flat layer as if it were a piece of paper in 3D, so I can make it look like it’s wrapping around an object. This is a very tedious and time consuming process, and it’s only just the beginning. In order to really make a texture work, you have to sit there and paint over it, so the “stamp” basically winds up being a guide to help you figure out where to place highlights and shadows nicely. That is by far the most time consuming part.
Willy’s shirt texture came from a brush I made from a picture of burlap. His skin is mostly mine, particularly my knees, but also a little frog skin and orange peel. Sherman’s skin is all frog, and the stone textures are, well, stone (made from pictures of stones around the yard). I try to use my own photos to make my brushes, but sometimes I don’t have the time or resources to, say, go catch a frog, sedate him, and take some macro shots of his skin. In those instances I rely on Google image searches.
Another little trick I tried out for the first time with this image is blurring the back ground to create depth of field. If all the various elements were organized by layers into groups properly, I could have just blurred the three different depths of background in a straight forward manner. Unfortunately, things didn’t work out that way, so I ended up create a flat composite of all the layers and duplicating that several times. I kept an unblurred layer, and then blurred the remaining layers in various increments using the Gaussian blur filter. I then applied layer masks, which basically allow you to non-destructively erase things and reveal the layers beneath. So, for example, the unblurred layer was at the bottom of the stack, so I added masks to the three layers on top and “erased” the area where Willy, Sherman, and the interior of the building are, revealing the sharp, unblurred layer at the bottom of the stack. I could then erase different areas on each of the blurred layers to reveal the more blurred layers the further back you go. It really makes more sense in application than my explanation just did…
Before I go, here are a few close ups so you can kind of get a better sense of the painting and, in general, work that goes in to the textures. Next up for me now that Willy is done?…I’ve got some logistics to figure out for the shirt business, there’s the 10 Things project, there’s Revery, there’s the new Chimera project kicking around my brain…
Thank goodness I have horrendously wrinkly knees…
I still need to work on creating atmosphere and mood and fun little dust particles.
Willy is one cool character!! He needs a home in your universe…
[…] Previous […]
Finally catching up a bit. I love this! The textures are amazing. *thumbs (and eyeballs) up*
Thanks for the eyeballs. Texturing is tedious but fun. I’ve always marveled at other digital artists incorporation of texture, and when I heard you could make texture brushes, I figured it was going to be easy, almost “‘cheating”. Now I realize it’s actually very labor intensive, but worth it.